Flip an image means mirroring the image, either vertically or horizontally. When you flip an image, the left side of the image will be the right side of the top becomes the bottom. There are some ways to flip an image. You might use some image editors on a computer or even a smartphone.
But, how to flip an image in Google Docs which has been inserted into the document? Here you can see a few simple ways to flip an image in Google Docs using the drawing window.
Flip an image in Google Docs Using Drawing Window
Google Docs allows you to flip an image using the drawing window. Follow the steps below!
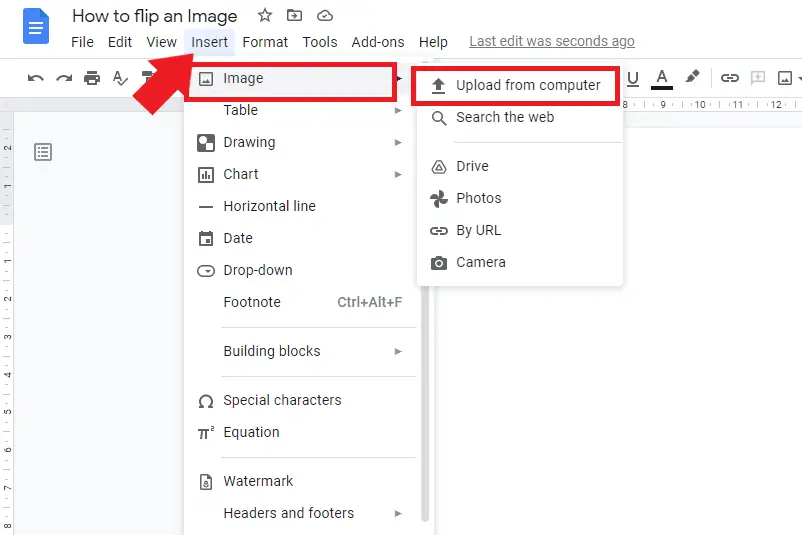
1. Firstly, you need to open your document in Google Docs where the image is inserted. If you haven’t dropped any images, you can upload the image by selecting “Insert” in the menu and clicking “image”. Then, you can choose “Upload from computer” if the image is on your computer or you might upload the image by selecting other options such as through URL (link of the image), drive, or your computer’s camera.
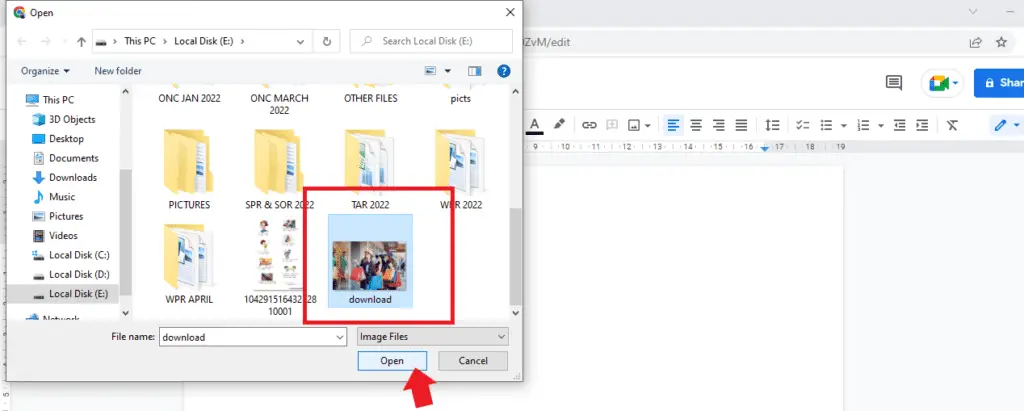
2. To upload an image from your computer, you can find the image that you need to upload and select it. Then, click “open”.
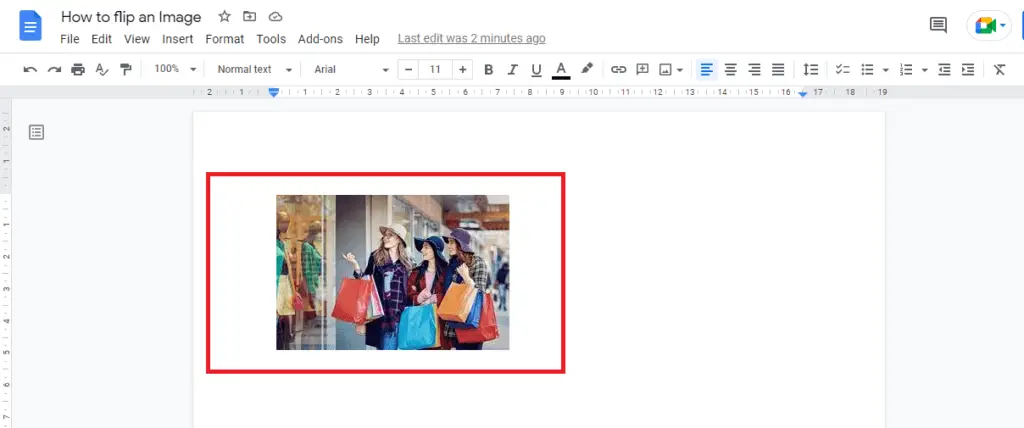
3. Now, your image will be inserted into your document.
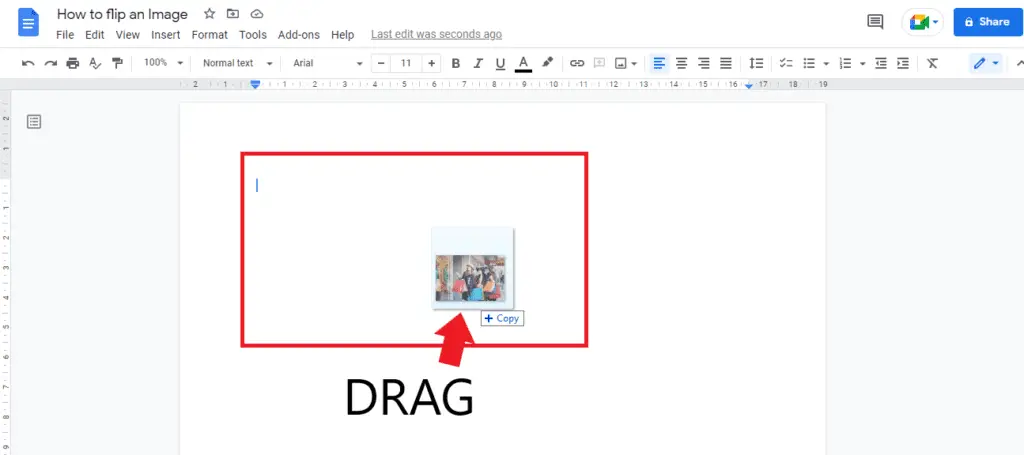
4. Inserting an image into a Google Docs document also can be simply done by dragging the image from the computer into the page of the Google Docs document.

5. When the image has been inserted, you can start mirroring your image on a vertical axis or horizontal axis. Select your image and press (“CTRL + X “ for windows users) or (Command + X for a Mac) to cut the image first, then place your cursor on the “Insert” tab and find “Drawing” in the option.
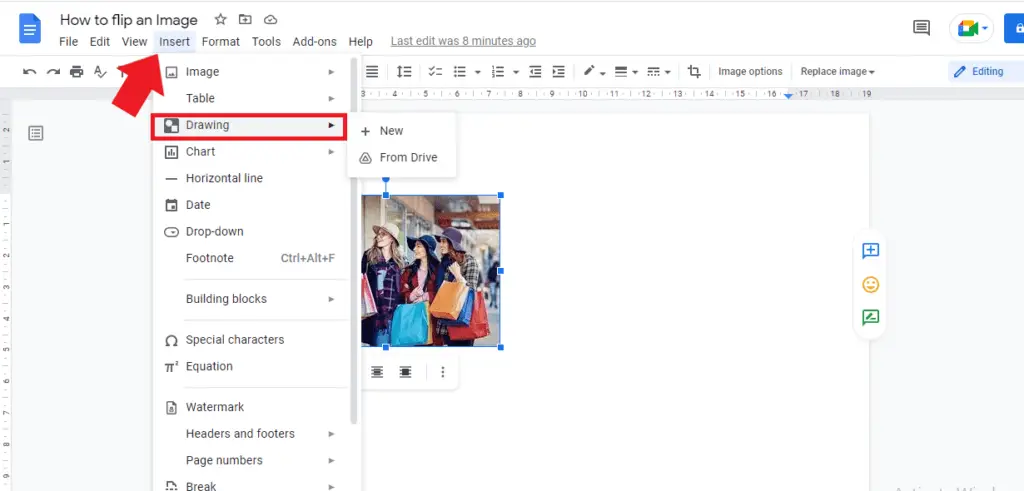
6. Click “New” so that you can open the drawing window as below.
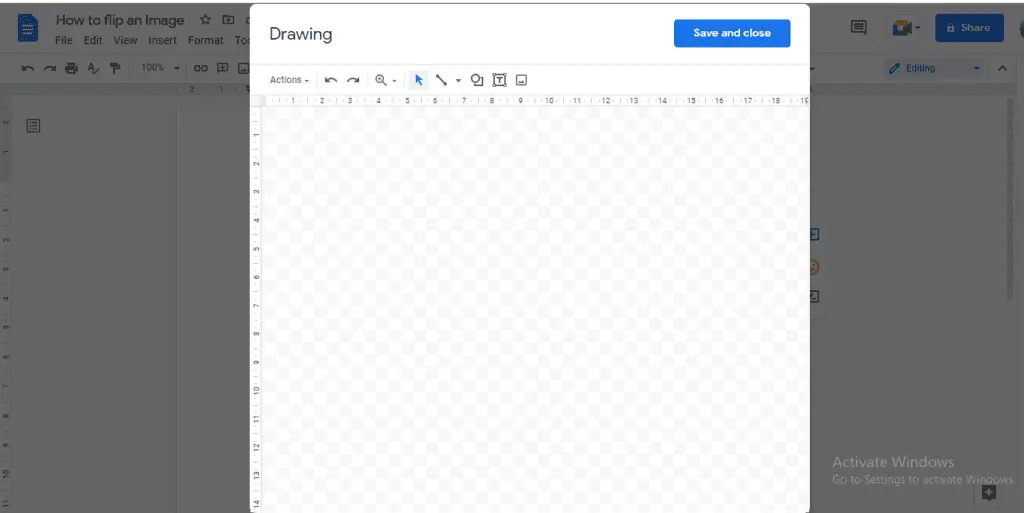
7. After the drawing window has appeared, you can paste the image thereby pressing “CTRL + V” or “Command + V”. You can resize your image by dragging each corner to the center.
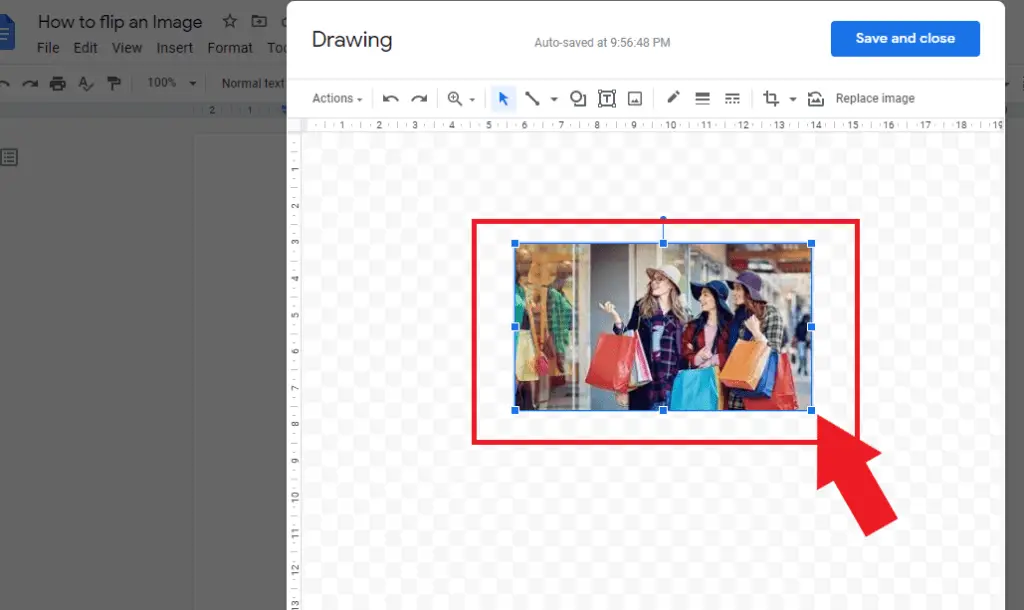
8. Next, select your image and then click the “actions” tab.
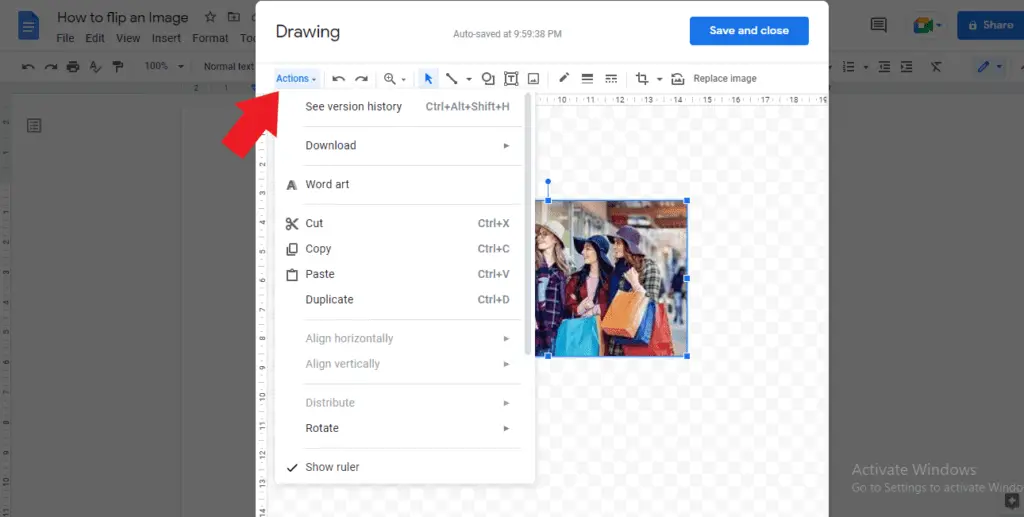
9. Find “rotate” in the drop-down menu and now you are able to choose whether you want to flip the image vertically or horizontally.
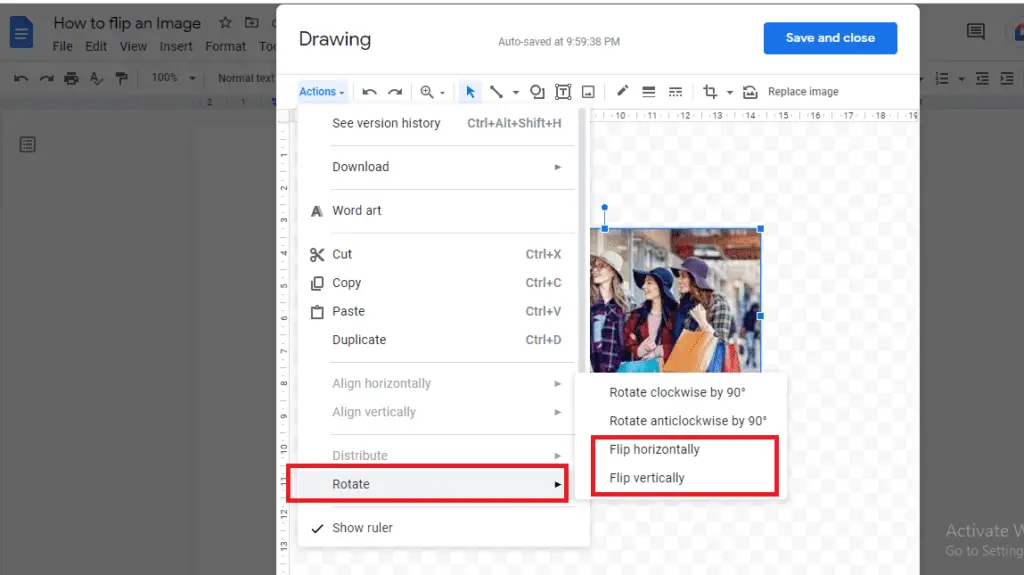
10. In the end, your image will be successfully flipped. Thus, you can click the “Save and Close” button.
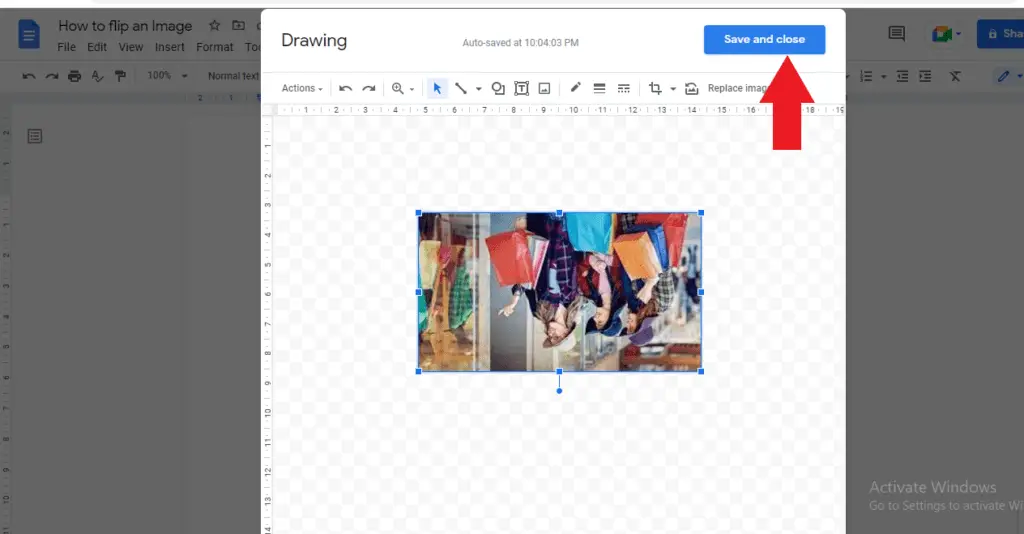
Those are the simple steps of how to flip an image in Google Docs. However, it only can be applied on a PC or web version. In other words, it doesn’t support flipping an image on Google Docs mobile version.
So, if you are using Android or iPhone, you need to use image flip tools. You can find them in the play store or app store. Launch the app, flip the image and insert it into your document in Google Docs.


