Three ways of How to do hanging indent in google docs that you can simply apply through your computer.
Hanging indent is the indentation of the second or the third line in paragraphs, excluding the first line. It’s commonly found in a bibliography or a work citation. You can use 3 methods of creating a hanging indent in google docs, which are using the ruler, the indentation options dialog box, or a keyboard shortcut.
However, You need to assure that you have got your Google Drive Account. Hence, you can open the Google Docs document which requires a hanging indent. It’s preferable for you to access Google Docs in Chrome or you may launch any web browser from your computer device.
Creating Hanging Indent with Ruler
One of the alternative ways that you can use to design a hanging indent is by manually using the ruler in Google Docs.
1. First, you may start by selecting the paragraph, the bibliography, or the citation that you need to indent. You are allowed to highlight or select more than one so that you can do multiple hanging indents at once in a short time.
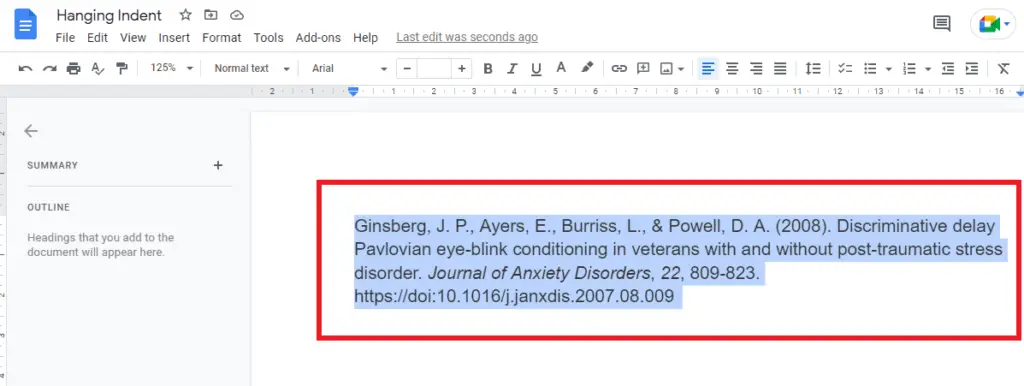
2. Next, you can drag the “left indent” of the ruler to the position that you prefer.

3. But you have to make sure that the first line isn’t moved along with the left indent since they have to be separated from each other.

The indentation Options Dialog Box
The next method of creating a hanging indent in google docs is much easily done using the indentation option dialog box. It would be the easiest way that you can apply here.
1. First of all, you just need to select the paragraph (s) or citation (s) in the Google Docs document as the first step as you do in the previous method.
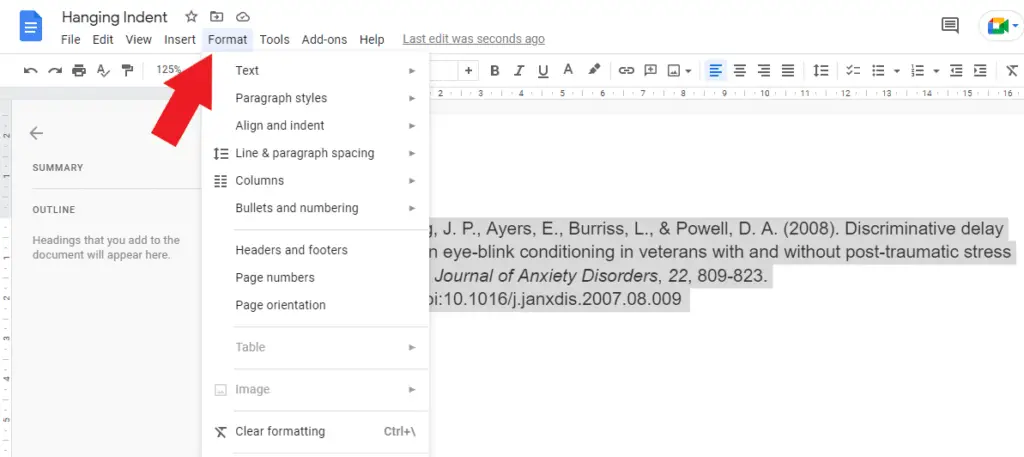
2. Having selected the text, place your cursor in the “format” option in the menu and you can directly click it.
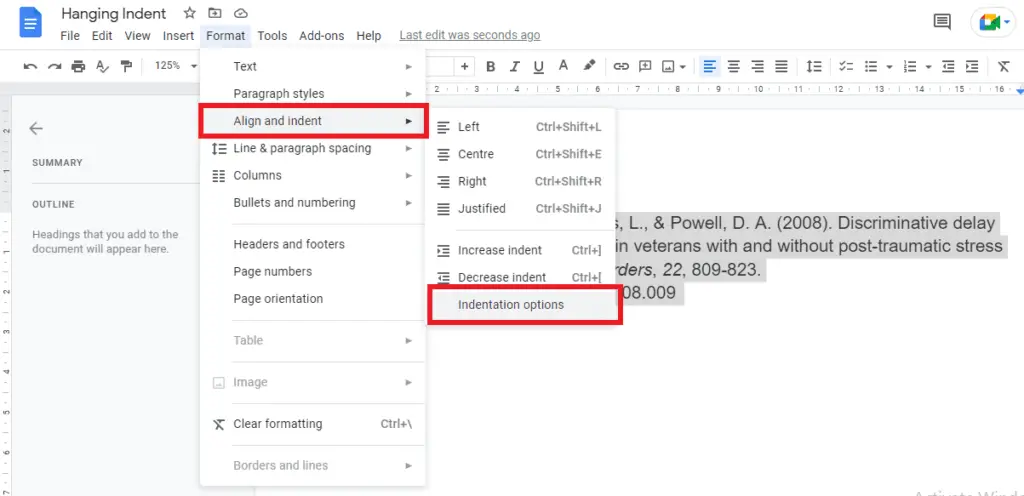
3. After that, you may find and select “Align & Indent” and then click “indentation option”.
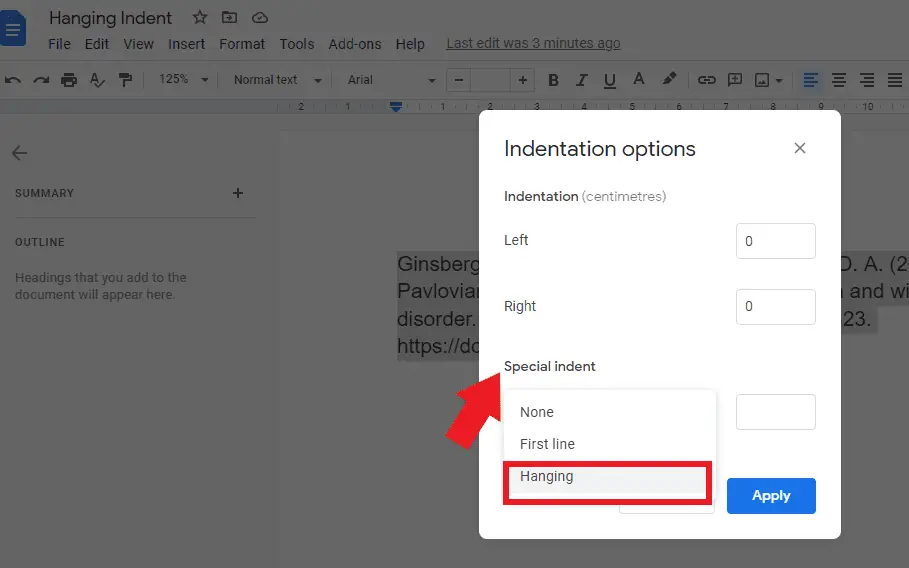
4. If the dialog box appears, please select the “Hanging” in the special indent menu. Then, click “apply”.
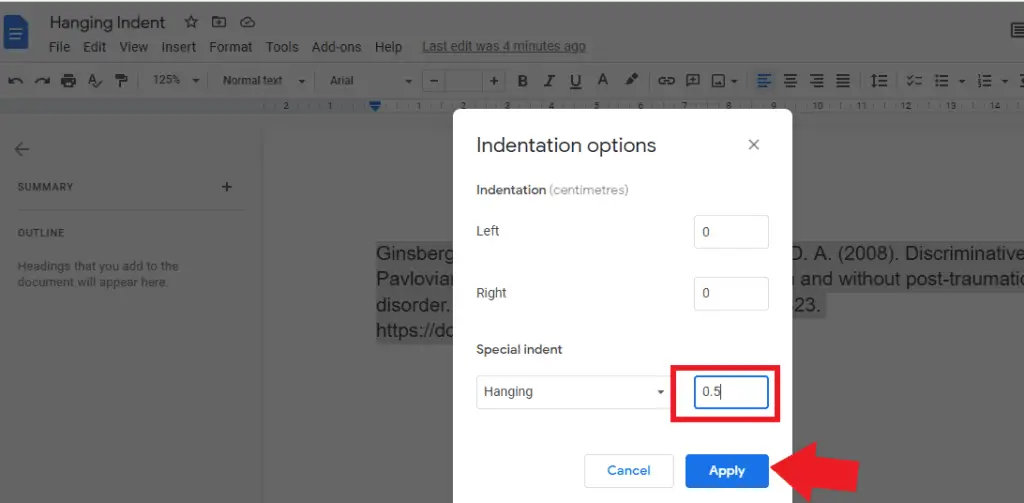
You may also enter and modify the indent amount in inches or the measurement system in the box next to the hanging option based on your own preference. Bear in mind to click “Apply” to see the result.
Hanging Indent Using A Keyboard Shortcut
Creating a Hanging Indent In Google Docs document can be also applied through the keyboard shortcut.
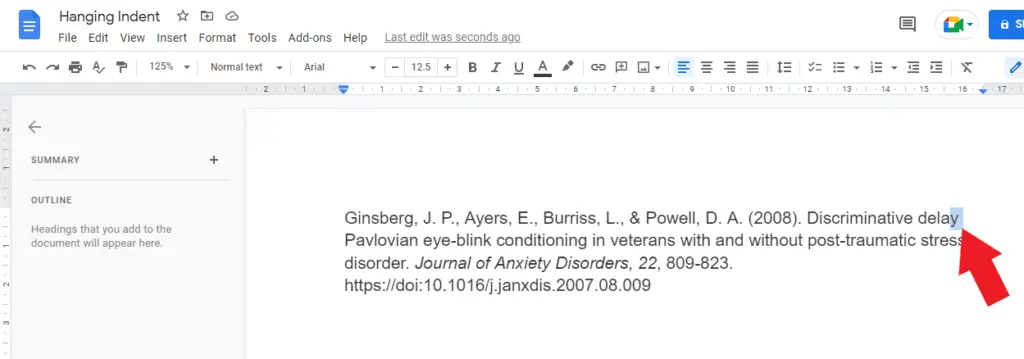
You only need to put the cursor at the end of the first line that needs a hanging indent.
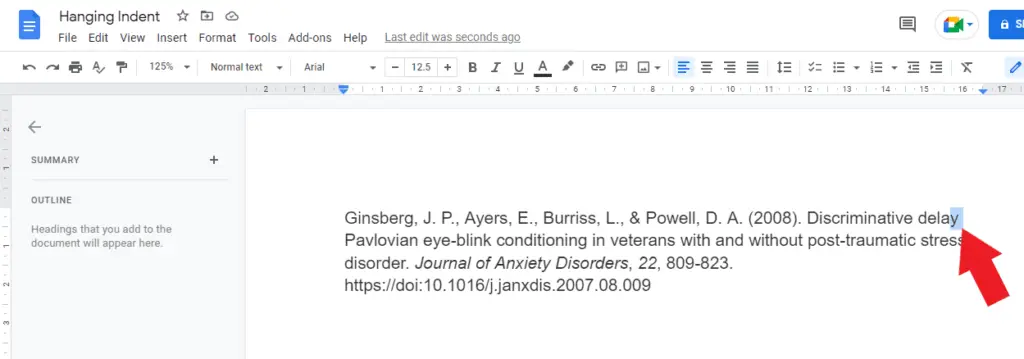
After that, you can press Shift + Enter or Shift + Return and then press Tab. It sounds simple and easy. However, it’s better to use the two methods above if you need to do a hanging indent for multiple paragraphs or references quickly.
