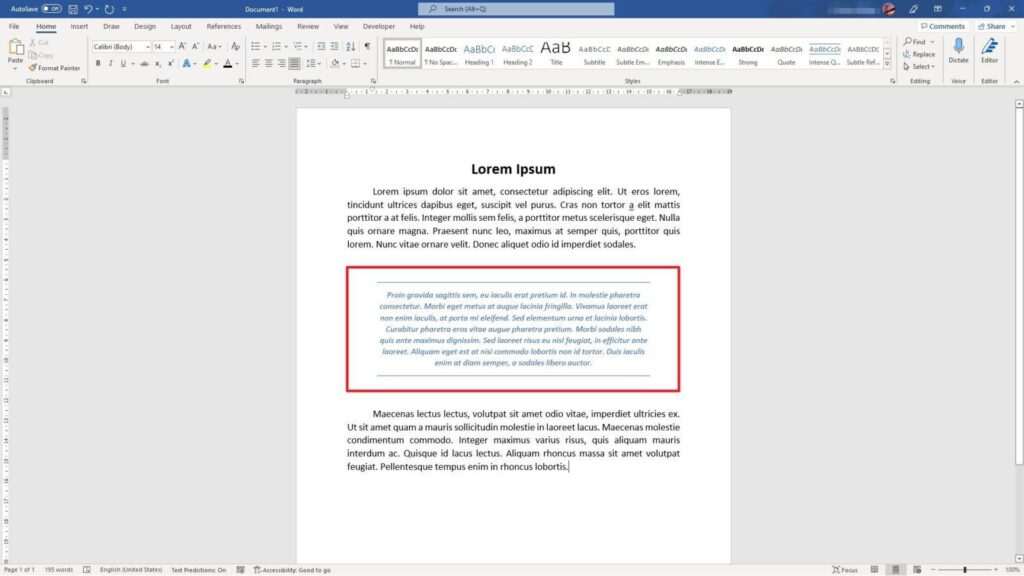
Microsoft Word lets you choose various text formats to make it look more attractive or stand out from the rest. Alternatively, you can also customize your own text style from its font type, size, color, and other attributes. But should we redo the process in reverse if we want to go back to the default style?
Not necessarily. Microsoft Word ensures you don’t have to repeat the process if later you changed your mind about the design. In the following guide, I’m going to cover three methods to clear text formatting in a Word document.
Be sure to follow each method because it gets easier down the line. So, without further ado, let’s get into it!
Method 1
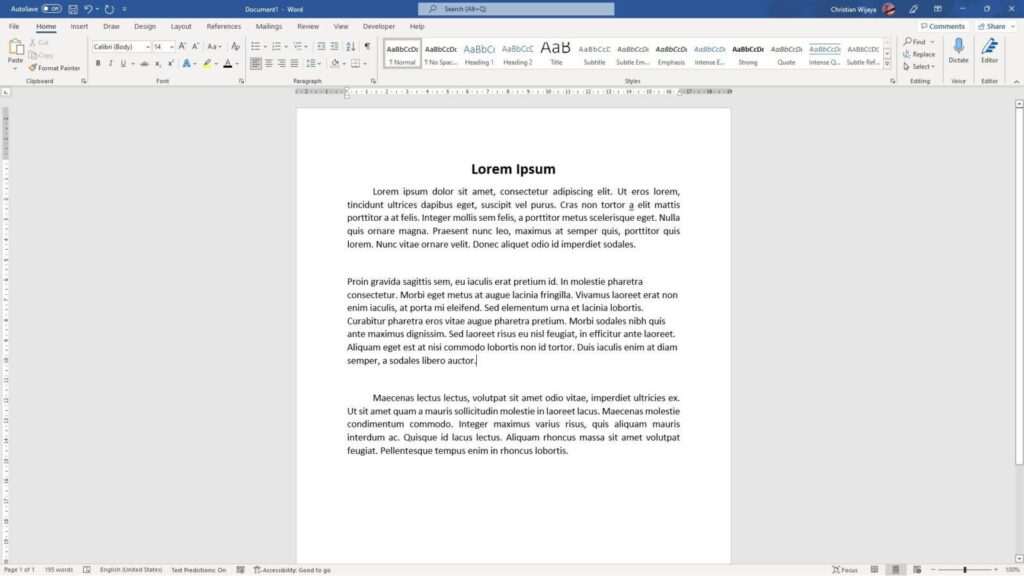
1. Open a Word document. In this example, I want to make the second paragraph look like the rest.
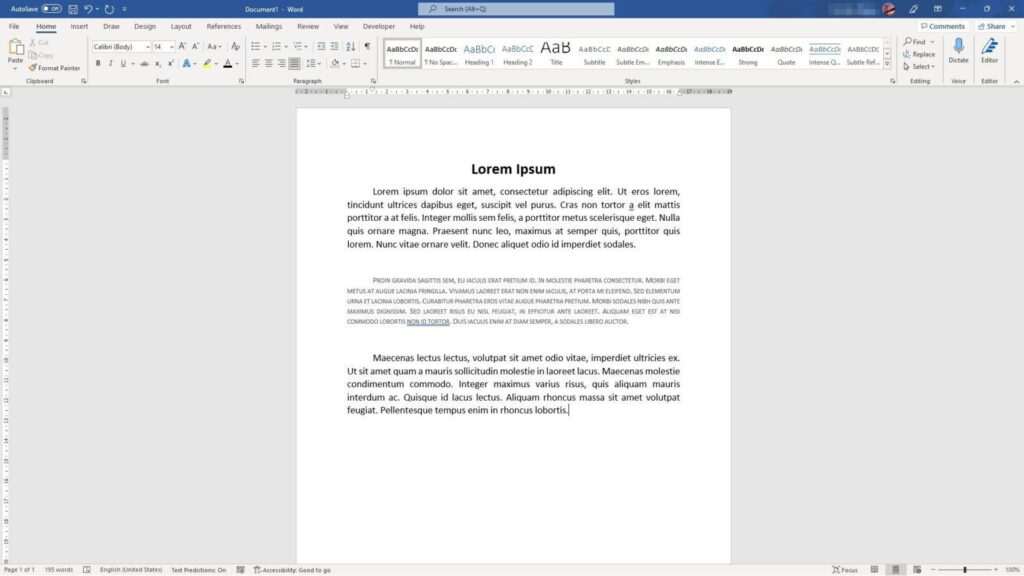
2. Select the text.
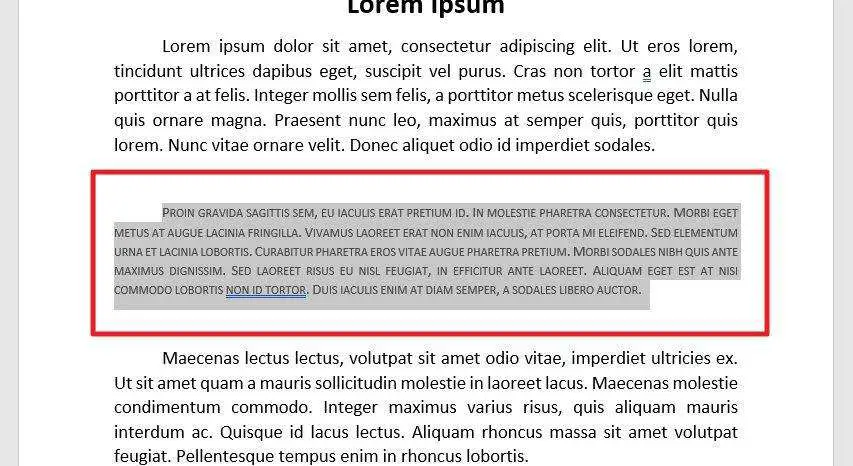
3. Navigate to the Home menu.

4. Open the Style dropdown menu.
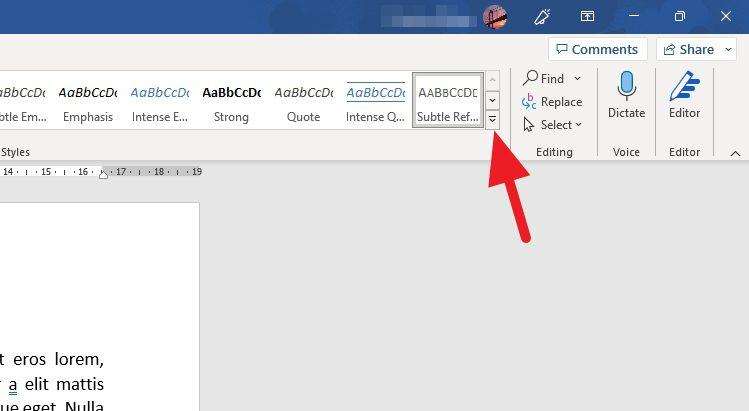
5. Then, select Clear Formatting.
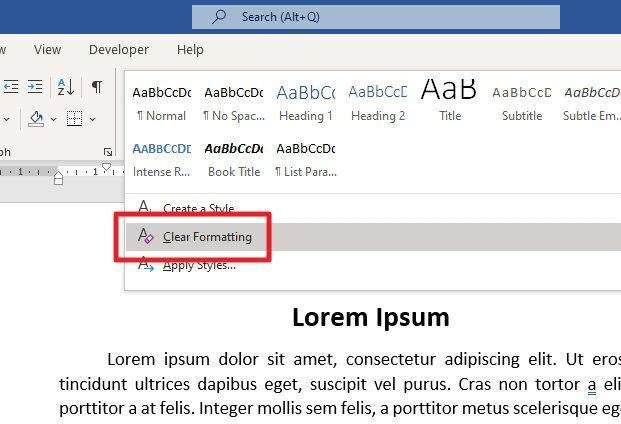
6. The formatted text has been cleared.
Method 2
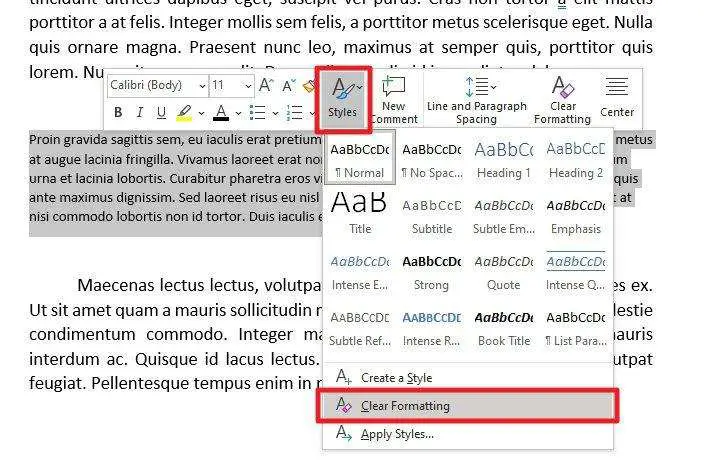
After selecting the text, you can briefly see a row of menus. On that menu, click Styles and select Clear Formatting. This method may be a bit tricky for some as the menu only appear once and won’t again if you ignore it.
Method 3
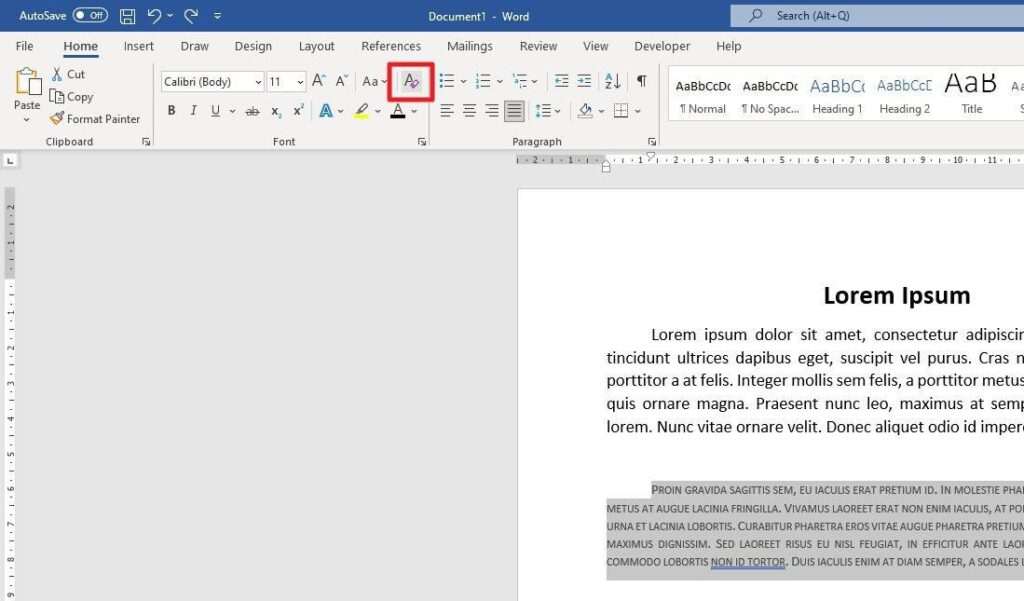
If you are not very good at catching the menu from the previous method, then this is the better alternative. After selecting the text, go to Home > Clear All Formatting (symboled with the letter “A” with an eraser icon).

