Adding additional pages in Google Docs is a useful way to organize longer documents or presentations. Whether you want to start new sections, add cover pages, or insert page breaks between ideas, Google Docs makes it easy to customize your page layout. This guide will teach you five key ways to add and manage pages.
1. Place Cursor Where You Want the New Page
The first step to adding new pages is positioning your cursor where you want the page break to start. This indicates where your current page will end and the next one will begin.
To add a page mid-document:
- Scroll to the point where you want to start the next page
- Click your mouse at that location
The page break will be inserted above the paragraph where you placed your cursor.
To add a title page:
- Place your cursor at the very start of the document
- Then add the page break
2. Insert Page Break
Once your cursor is positioned properly, adding the actual page break is simple:
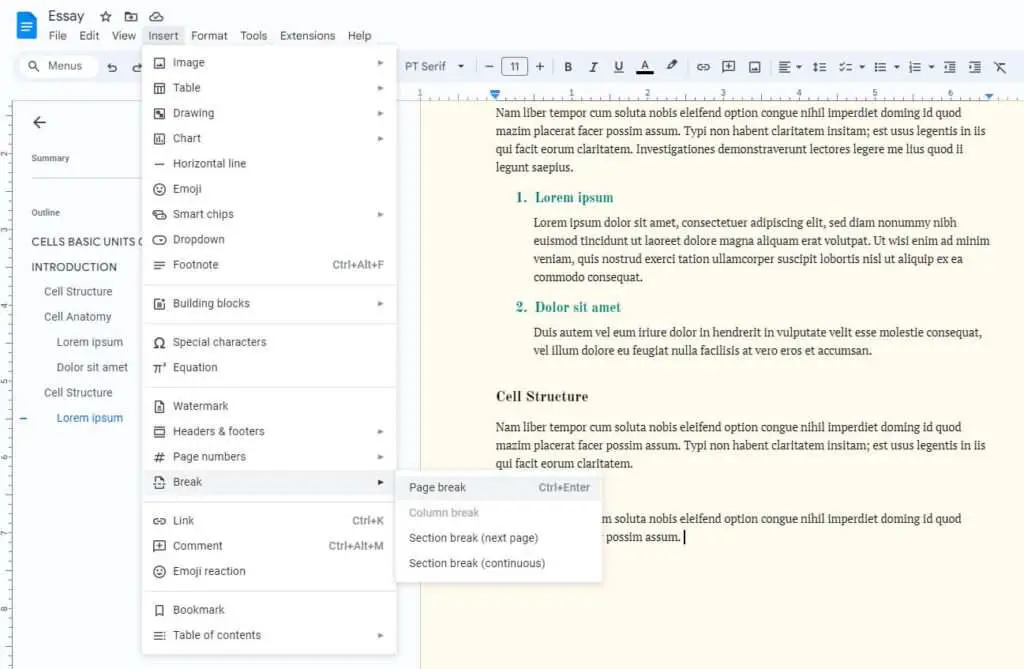
- On the Insert tab, select Break > Page Break
- Alternatively, press Ctrl+Enter (Windows) or Command+Enter (Mac)
You’ll see a page break symbol appear indicating the split between the two pages.
Page break symbol in Google Docs
On mobile:
- Tap the + icon
- Select Page Break
The page break will be added where your cursor is located.
3. Page Numbers and Headers/Footers
Each new page section can have unique headers, footers, page numbers, margins, and other attributes.
To customize:
- Double click the header or footer area
- An editing window will appear
- Enter text or page numbers as desired
For long documents, make sure check the box for Different first page:
Different first page option in Google Docs
This lets you have a separate title page style.
To add page numbers mid-document:
- Again, place your cursor where you want the numbers to begin
- On the Insert tab select Page Numbers > Page X
4. Section Breaks
While page breaks split your document into visually separate pages, section breaks divide your document into editorial sections that may still remain on the same page.
For example, you may want the introduction and conclusion on separate pages, but have the body all flow together as one cohesive section.
To add a section break:
- Place cursor at end of a section
- Insert tab > Break > Section Break (Next Page)
Sections can have their own headers, footers, page numbering, and other customizations without forcing a page split.
5. Removing Page Breaks
To delete an existing page break:
- Click your cursor on the page break symbol
- Press Backspace or Delete
The two pages will be merged.
You can also adjust section margins rather than removing the break:
- Double click header/footer
- Under Layout, reduce the margin size
This will allow more room for text without deleting the page split.
Recap
Adding and managing pages is crucial for organizing longer Google Docs. By learning how to add page breaks, customize page numbers, use section breaks, and delete breaks, you can create a customized multi-page layout. Test out these tips the next time you need to format a report, proposal, book manuscript, or other document!


