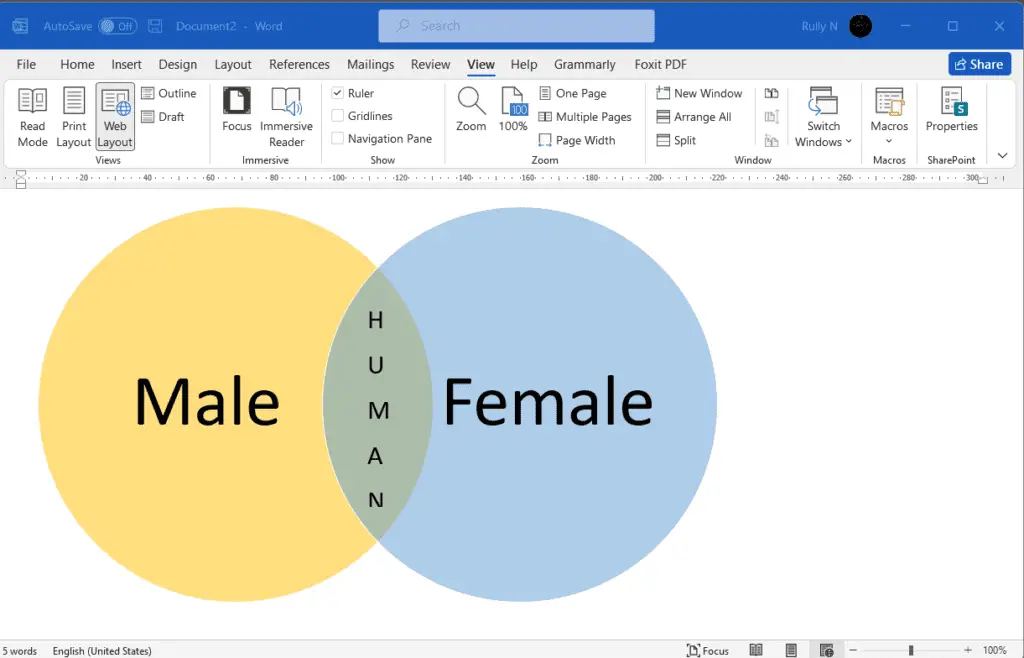
In our previous tutorial, we already explained how to create and design Venn diagrams in Google Docs. Now we’re going to explain how to do it in Microsoft Word.
There are a couple of ways to create a Venn diagram in Word. You can create two circles that are intersecting using a shape, or in Microsoft 2007 and greater you can create a Venn diagram using SmartArt. In this tutorial, we’re using Word 2021.
1. Go to the Insert tab and click SmartArt.

2. Click Relationship, and you’ll see Basic Venn. Click OK.

3. Word will insert a triple Venn diagram. But if you want to use a regular Venn diagram with two circles, just click on one of the circles and delete it.

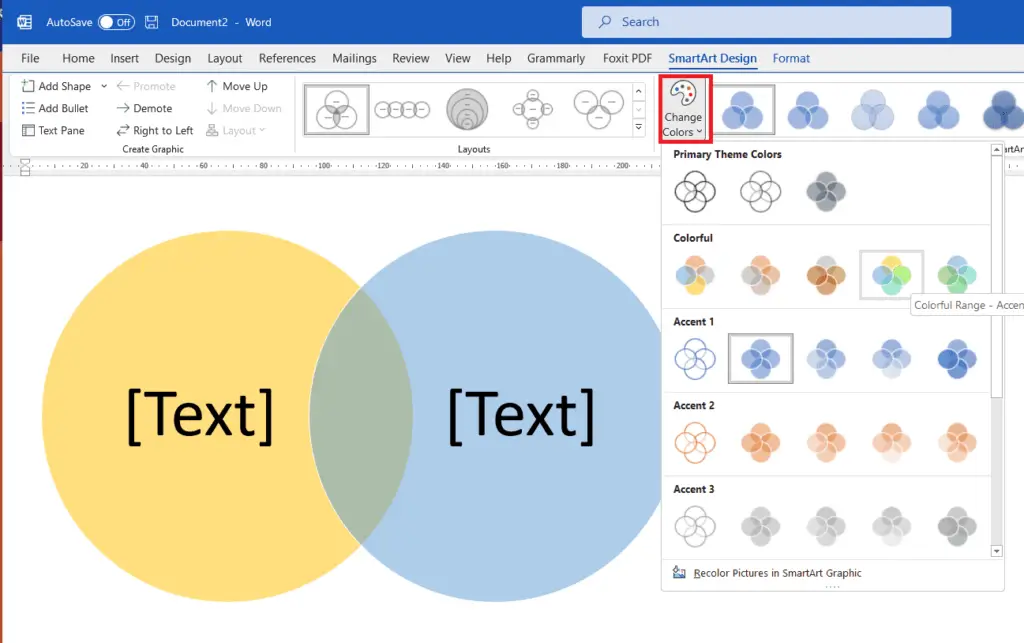
4. You probably want to have a different color than just the default blue and dark blue. Click on one of the circles, in the SmartArt Design tab click Change Colors and pick the colors that you prefer.
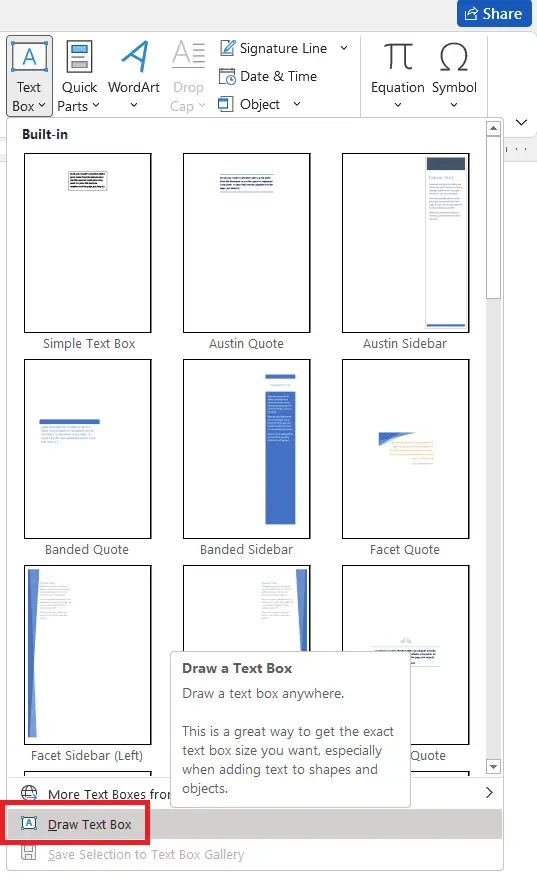
5. To change the text in the first and second circles, you can edit it right away instantly. But for the text in the overlapping section, go to the Insert > Text Box > Draw Text Box.
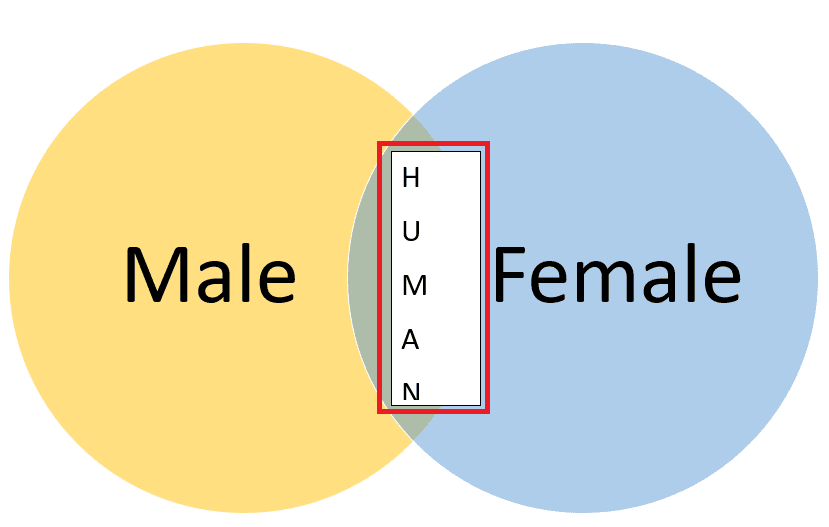
6. Place the text box right in the overlapping section and start to put the text.
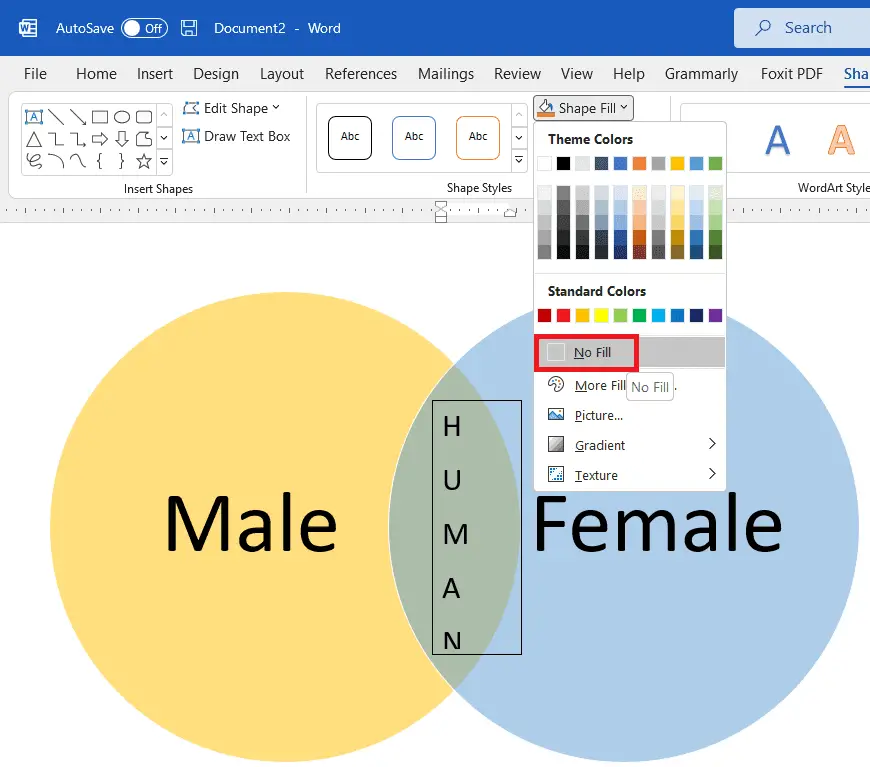
7. Now go to the Shape Format > Shape Fill > No Fill.
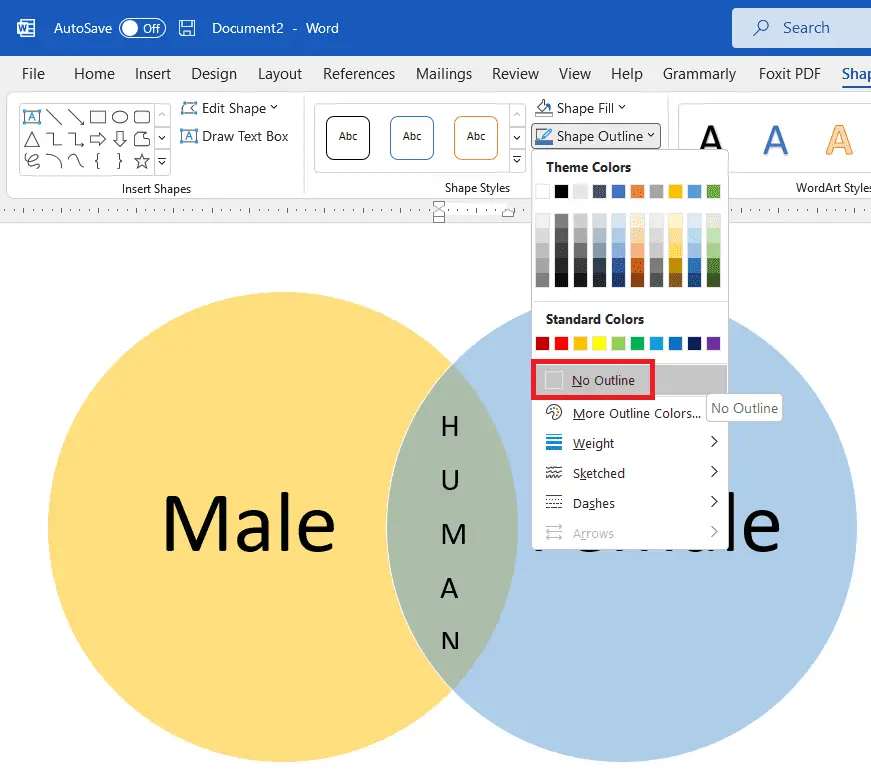
8. Next, Shape Outline > No Outline.
This is a simple way to create couple of Venn diagrams, whether it’s a regular Venn diagram or a triple Venn diagram using Microsoft Word.

