Adding images to a Word document can greatly enhance the visual appeal and help illustrate key points. However, the default behavior for inserted images is to have text tightly wrap around them, which restricts free movement. With a few simple steps, you can configure images to move freely for precise positioning.
Enable Text Wrapping
The first step is to enable text wrapping for the image:
- Select the image you want to move freely.
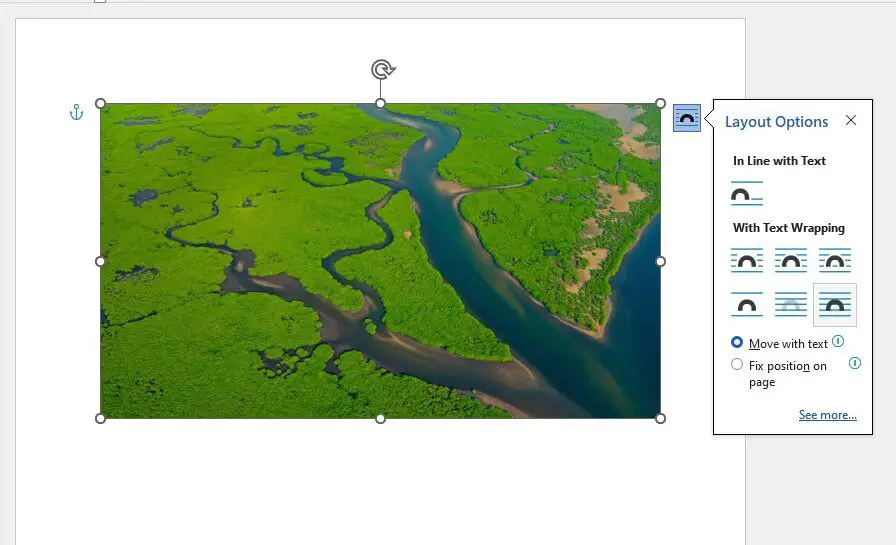
- Click the Layout Options icon that appears near the upper-right corner of the image.
- In the menu that appears, choose any text wrapping option except “In Line with Text”. Common choices are “Square” or “In Front of Text”.
This will allow the image to move independently of the text.
Precisely Position the Image
Next, you can precisely position the image:
- With the image still selected, go to the Format tab on the ribbon.
- Click Position > More Layout Options.
- In the Layout dialog box, go to the Position tab.
- For horizontal and vertical alignment, choose “Page” or “Margin” as the reference point.
- Enter precise values for the distance from that reference point. For example, set both to 0 cm to position the image in the top left corner.
Use the preview pane to visually confirm the position is correct before inserting.
Tips for Moving Multiple Images
When working with multiple images, here are some useful tips:
- Group images to move them simultaneously – Hold CTRL and select all images, right-click one image, choose Group, then drag to move them together.
- Overlap images – Select an image, go to Layout Options > See More > Check Allow Overlap, repeat for each overlapping image.
- Align images – Select all images, go to the Format tab > Align, choose alignment type like “Align Center”.
Advanced: Custom Text Wrapping
For more advanced text wrapping, you can customize the contour:
- Select the image, go to Format > Wrap Text > Edit Wrap Points.
- Drag the wrap points closer or further from the image edges.
- Add additional wrap points with the red line.
This will finely contour the text wrap shape around irregular image shapes.
Fix Image Position on Page
To fix an image to a specific spot on the page:
- Select the image.
- Go to Layout Options > In Front of Text.
- Check Fix position on page.
Now text can flow freely without moving the fixed image.
Conclusion
With these tips, you can precisely place images for maximum visual impact in your Word documents. Experiment with different text wrapping contours and alignment options to find the ideal layout. Mastering image positioning brings your documents to the next level.


