Do you want to make your Google Docs stand out from the crowd? Adding a custom font is an easy and effective way to do just that! With a few simple steps, you can install any of the hundreds of free fonts available online and begin styling your documents with unique typefaces.
We’ll walk you through how to add and install custom fonts for Google Docs so that you can start creating stunning visuals right away. Here are two ways to do it.
First method: using more fonts
1. Click on the font where usually the text will show Arial as it’s the default font. Then on the drop-down menu click More fonts.

2. A window with a list of fonts available. Click on whichever fonts you want and they will appear under My fonts on the right side of the window.

3. Once you’re satisfied click OK. Now you’ll be able to select and use them from the main font menu.

Second method: using add-on
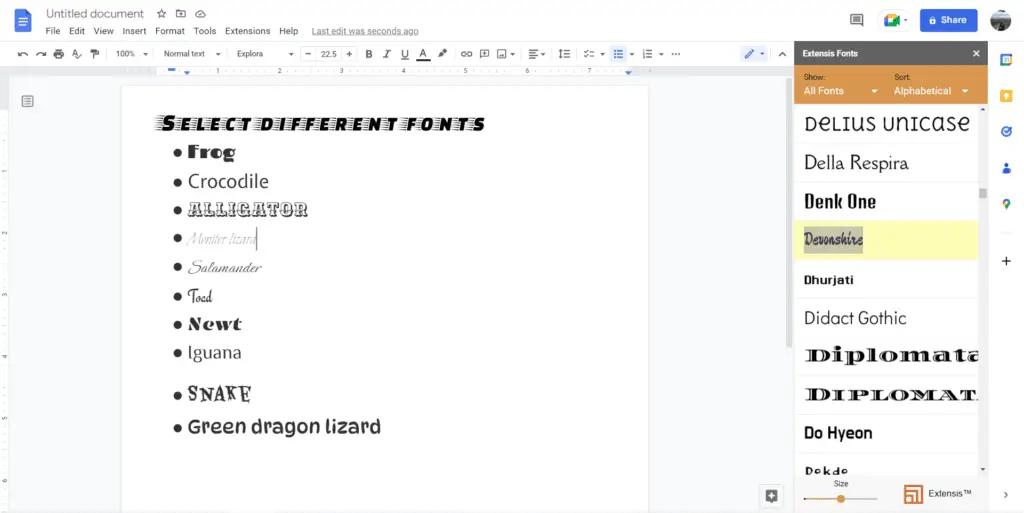
The additional fonts that Google Docs offers are still a bit limiting. Fortunately, Google Docs allows you to have additional fonts through an add-on. Not only are they easy to use, but they’re also free.
1. Install an add-on called Extensis Fonts. Visit this page to learn how to install an add-on in Google Docs.

2. Once the add-on is done installing, you can access it through Extensions, Extensis Fonts, then click Start.

3. Now highlight your text, and select the font to customize it.

Now you can add a more personal touch to your documents.


