There is numerous paid and free software that could help you to write something on top of a picture. Adobe Photoshop is perhaps the most popular one for the job. But for a trivial task like that, you don’t want to run a separate program when creating a document.
Microsoft Word is already good enough for some essential features such as cropping, resizing, and adding a filter. With a bit of creativity, you can write a word, sentence, or paragraph on top of an existing picture. This practice is perfect for conveying a message from a picture which in turn makes the document more appealing.
Here, I will show you how to write text on a picture in Microsoft Word (I would say any version of the program).
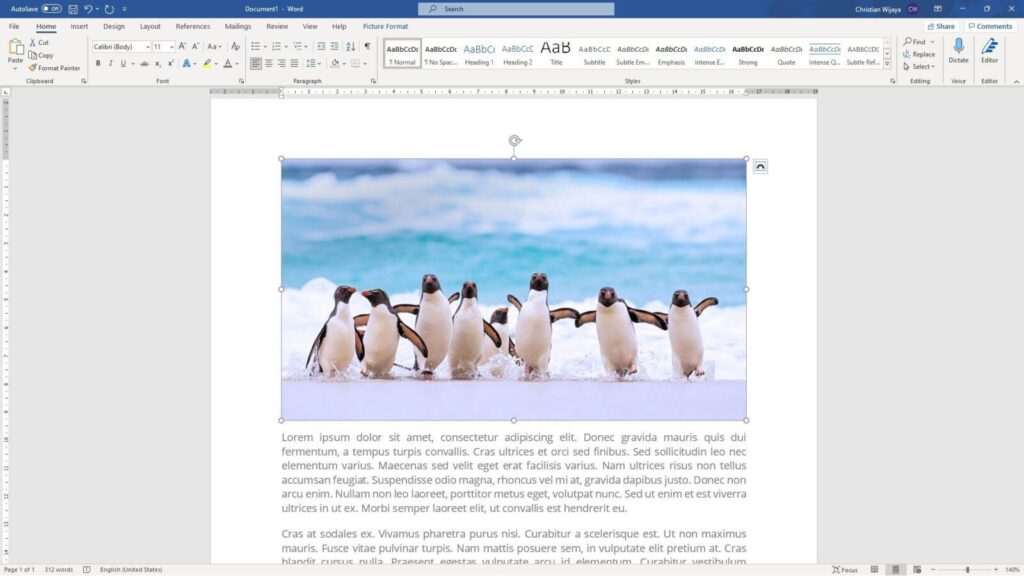
1. Insert a picture into your document. In case you don’t already know, go to Insert > Pictures.
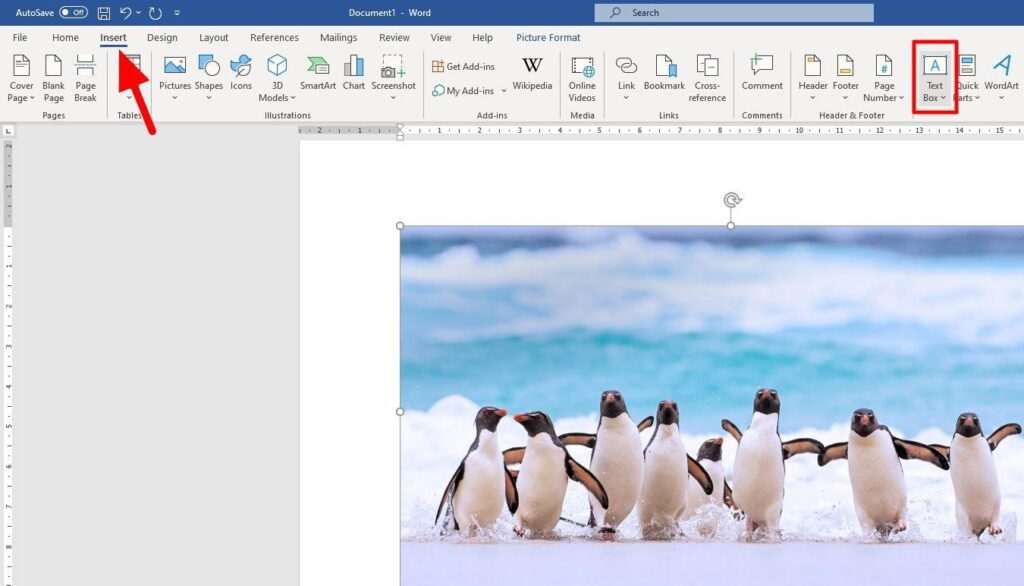
2. Under the Insert menu, click Text Box.
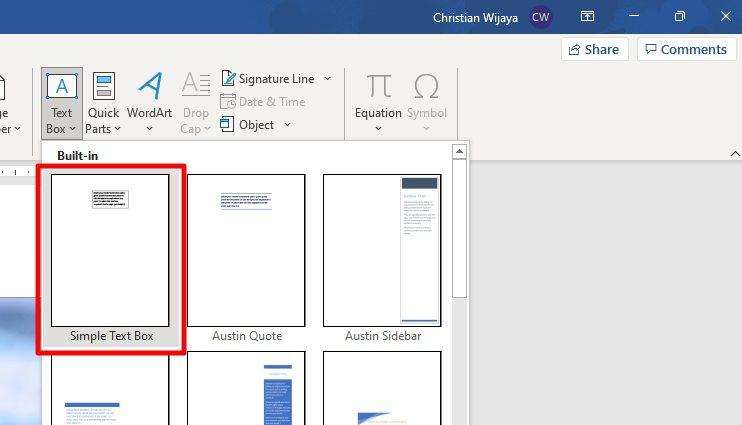
3. There are various styles, but I’m going to go with Simple Text Box.
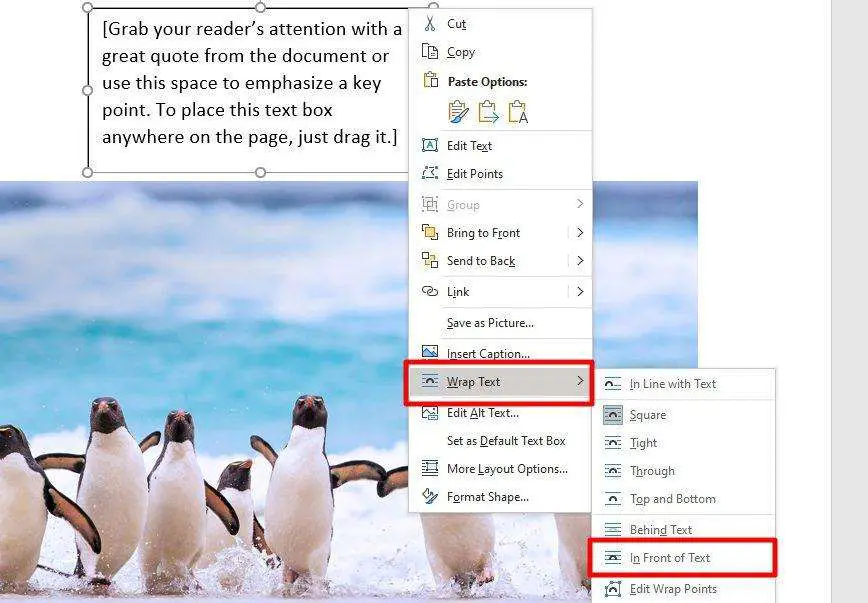
4. A new text box will appear and starts messing with the document, but we will fix that later. For now, right-click on it > Wrap Text > In Front of Text.
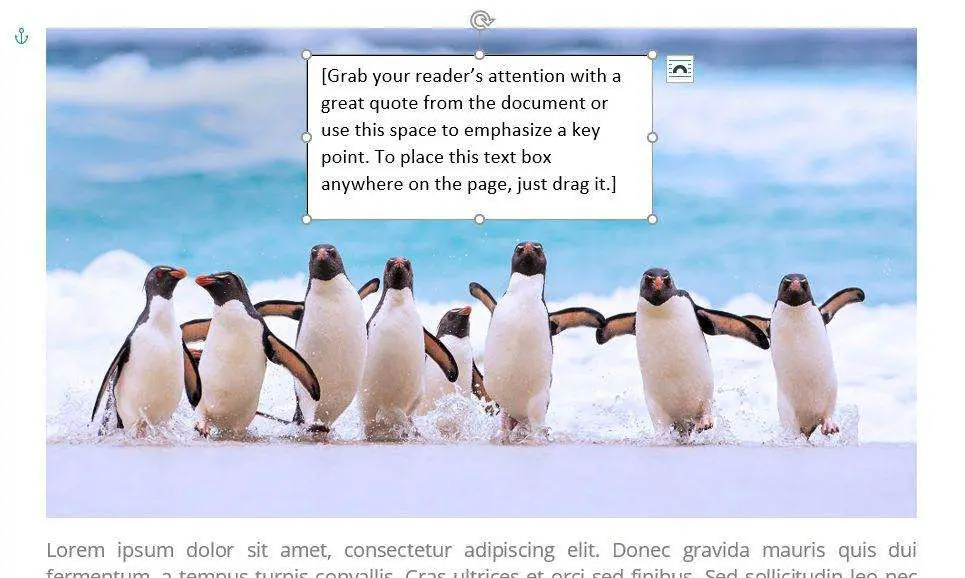
5. The text box will be movable. Place it on top of an image.
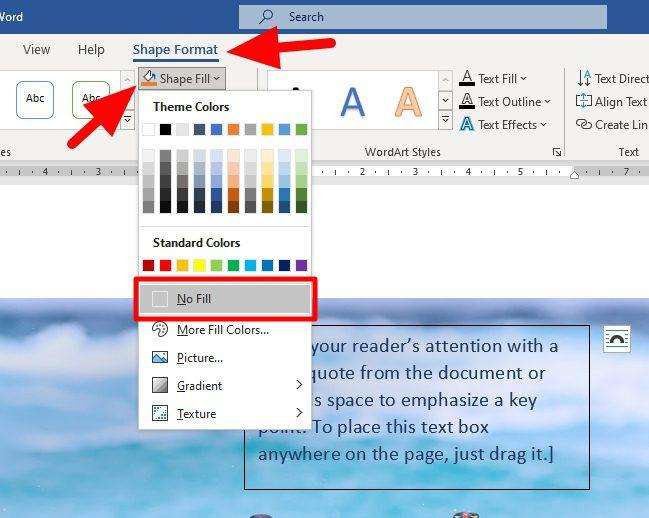
6. To remove the white background, click on the text box > Shape Format > Shape Fill > No Fill.
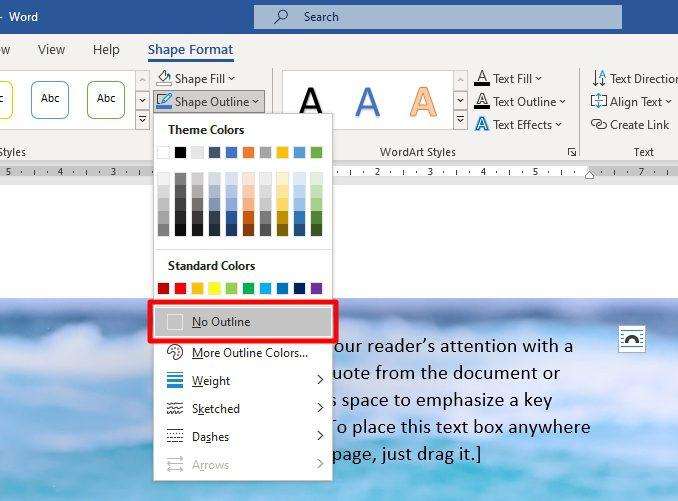
7. You can do the same for Shape Outline to remove the line border.
8. Then, type something on it, and don’t forget to modify its style so it blends nicely with the picture.
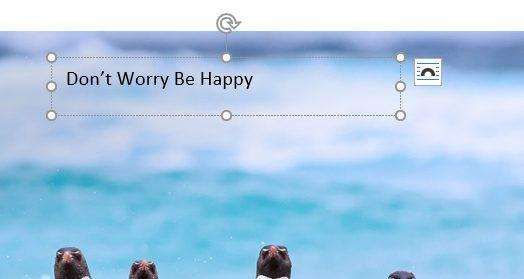
9. Now you have text on top of a picture.
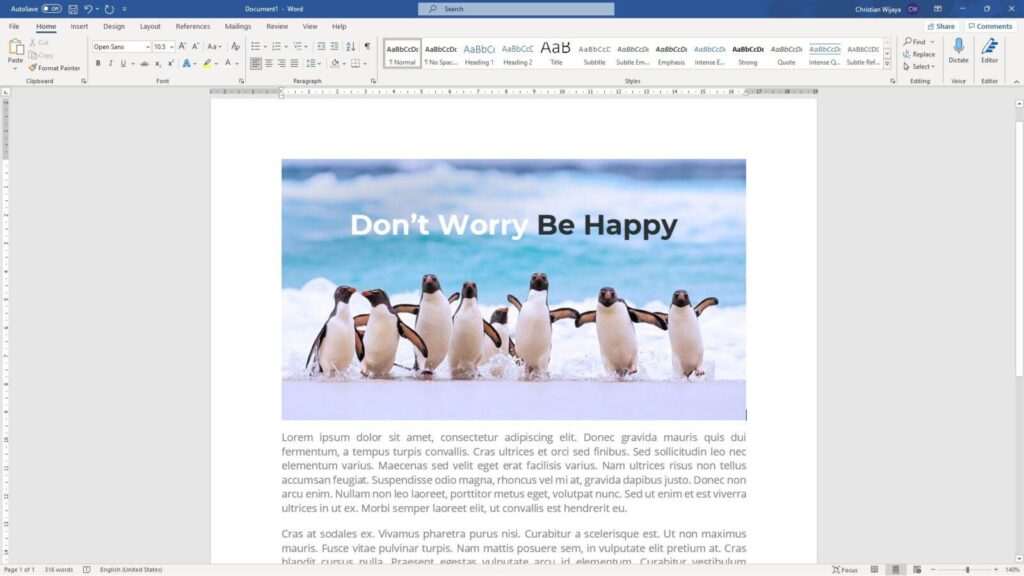
Pretty easy, isn’t it?
One thing to note here, in order for the text box to appear on top, the picture has to be in the background. Sometimes you may need to push the picture behind (right-click > Send to Back) or bring the text box higher (right-click > Send to Front).
In any case, I hope this guide helps you. Thank you for visiting.


