If you are using a recent version of Microsoft Word that is included as part of a subscription to Microsoft 365 (previously known as Office 365) or as standalone software that you purchased from the Mac App Store or the Microsoft Store on Windows, keep it up to date is simple.
How To Update Microsoft Word 365 On Mac
Step 1. Start by opening the Word application on your Mac before attempting to upgrade Microsoft Word if you have a subscription to Microsoft 365.

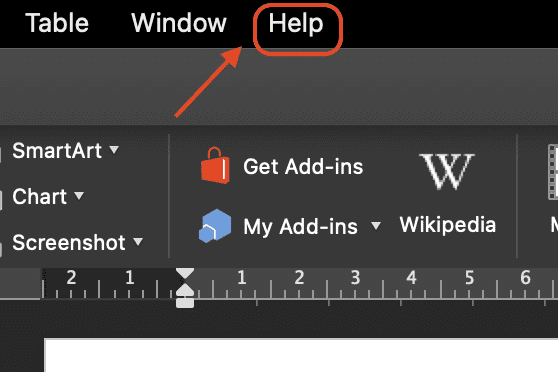
Step 2. Click “Help” on the menu bar that appears at the very top of the screen.

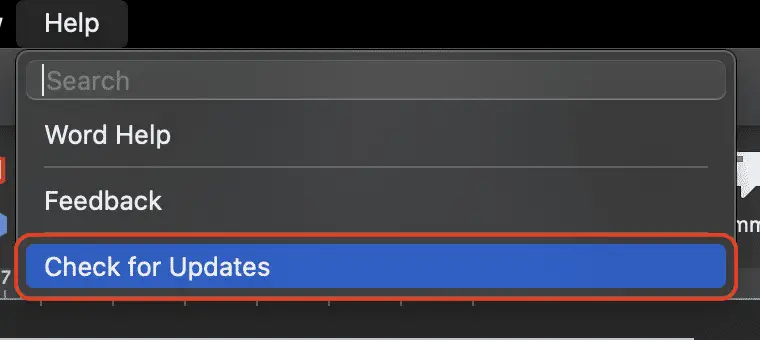
Step 3. And then select “Check For Updates” from the submenu that appears.

The office will launch Microsoft AutoUpdate to check for available updates, after which it will download and install those updates if they are available. When using the most recent version of Word, you will receive a notification stating, “All apps are up-to-date,” once you have reached this point.
After you have finished, make sure to close out of AutoUpdate so that you may get back to writing.
How to Update Word Purchased From an App Store
You can upgrade Microsoft Word directly from within the store application if you have already downloaded or purchased Microsoft Word as a standalone application from the Mac App Shop or the Microsoft Store on Windows. If you have already done either of these things, you are eligible to upgrade to Microsoft Word.
Step 1. Launch the App Store on your Mac.

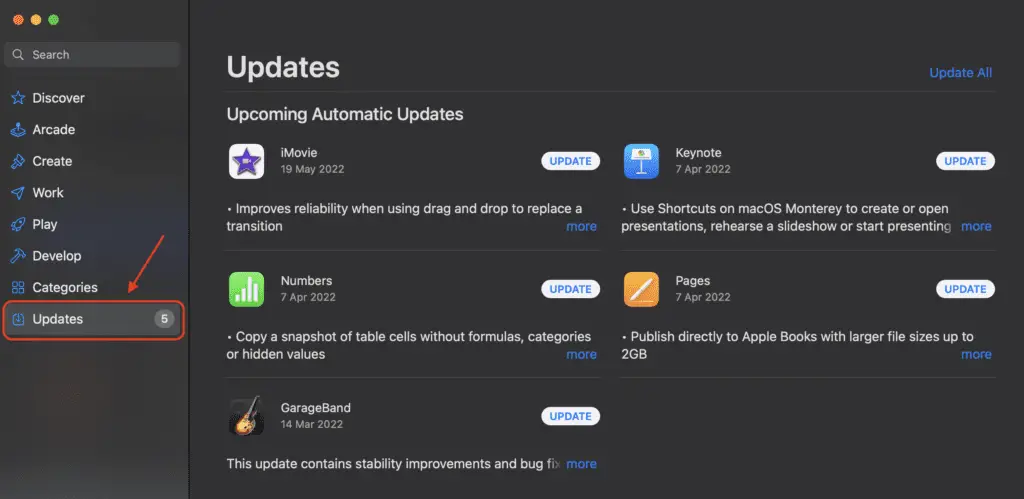
Step 2. Then chooses the “Updates” option from the menu in the sidebar.

Step 3. Find the “Word” app, and if there is a button labeled “Update” placed next to it, click that icon to install any available updates. Even though we don’t get Microsoft Word through the app store, the button says “Get.” On the other hand, if you have Microsoft Word downloaded onto your computer, it will show “Updates.”

Those are the simple steps on how to update Microsoft Word on Mac. There are two options, first, from Microsoft 365 itself, and second, from AppStore. You can easily do it by following those steps carefully.


