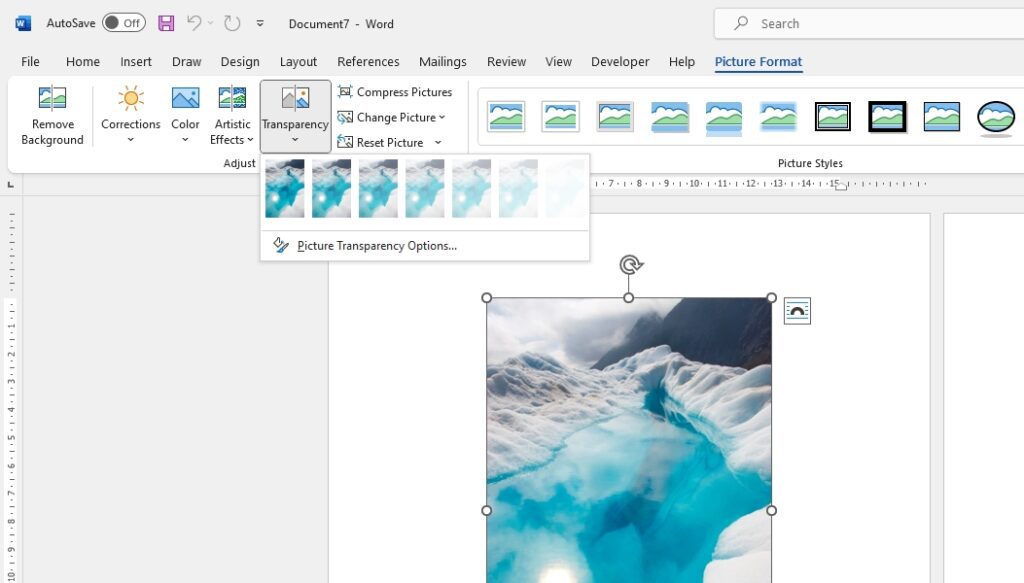
Taking screenshots in Microsoft Word 2010 allows you to easily capture images from other programs or parts of your screen and insert them directly into Word documents. This can help visually enhance documents and presentations. Here is a step-by-step guide to taking screenshots in Word 2010.
Insert Existing Screenshots
If you have existing screenshots that you want to insert:
- Open the Word document where you want to embed the screenshot.
- Click on the Insert tab.
- In the Illustrations group, click Screenshot.
- A gallery will appear showing thumbnails of screenshots you have recently taken. Click the one you want to insert.
The screenshot will be inserted into the document and you can move or resize it as needed.
Take a New Full Screen Screenshot
To take a brand new screenshot and embed it:
- Open the Word document where you want to place the screenshot.
- Switch to the window or program you want to capture and make sure it is not minimized.
- Press the Print Screen button on your keyboard to take a screenshot of the entire screen.
- Go back to the Word document and click Insert > Screenshot. The screenshot will now appear in the gallery.
- Click the screenshot to insert it.
Take a Screen Clipping
If you only need part of the screen, use the screen clipping option:
- Open the Word document.
- Click Insert > Screenshot > Screen Clipping.
- The screen will become opaque and your mouse will turn into a crosshair. Drag to select the area you want to capture.
- Release the mouse button and the clipped area will be inserted automatically.
Size and Position the Screenshot
Once inserted, you can resize or reposition the screenshot:
- Click the image to select it.
- Drag the sizing handles on the corners and edges to resize.
- Drag the image to move its position.
Crop the Screenshot
To crop the screenshot:
- Select the inserted image.
- Go to Format > Crop.
- Adjust the cropping area and click Crop to apply.
Add Effects and Enhancements
With the image selected, use the Picture Tools tab to add effects:
- Change brightness and contrast
- Add artistic filters
- Add picture styles and borders
- Compress images
Add Annotations
Use annotations to highlight parts of a screenshot:
- Select the image.
- On the Picture Tools Format tab, click Text Box or Shapes to create annotations.
- Customize fill color, outlines, text style as needed.
Use Headings, Lists and Formatting
Break up long sections of text using headings:
Taking Screenshots
Inserting Screenshots
Resizing and Positioning
Use bullet points for lists:
- Open Word document
- Click Insert > Screenshot
- Select screenshot
Bold text for important keywords and phrases. Italicize text to emphasize points.
Use block quote for tips and notes.
By mastering screenshots in Word 2010, you can greatly enhance your documents and presentations by embedding relevant images and illustrations with just a few clicks!


