Digitally signing a Word document allows you to add a signature that verifies your identity as the signer. It also ensures the document has not been altered after signing. This guide will walk you through the steps to digitally sign Word documents.
Why Digitally Sign Word Documents
Here are some key reasons to digitally sign your Word documents:
- Proves Authenticity: Your digital signature certifies you as the signer, ensuring authenticity.
- Detects Tampering: Any changes made after signing invalidate the signature, allowing recipients to detect tampering.
- Adds Legal Weight: Digitally signed documents may carry more legal weight compared to physically signed ones.
- Enables Workflow Automation: Signed documents can be automatically processed and routed based on signature status.
Prerequisites
Before digitally signing a document, ensure you have:
- A personal certificate installed to sign with. This can be obtained from a certificate authority.
- Word 2013 or above. Older versions have limited digital signature support.
Add a Visible Signature Line
Follow these steps to add a visible signature line:
- Open the Word document. Click where you want the signature line to appear.
- Go to the Insert tab and click Signature Line in the Text group. Insert Signature Line
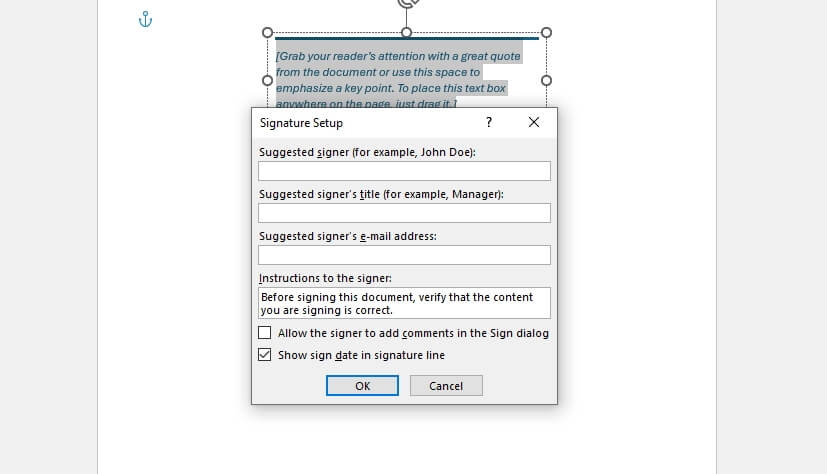
- In the Signature Setup dialog, fill in your name and other details. Signature Setup Dialog
- Click OK. The signature line is inserted containing an
Xshowing the signature location.
Sign the Document
To sign the document:
- Double click the signature line. The Sign dialog appears. Sign Dialog
- Select the certificate to sign with under Signing as.
- Click Sign.
- In the confirmation dialog, click OK.
The signature line now displays your inserted signature.
Add Invisible Digital Signature
To digitally sign without adding a visible signature line:
- Click the File tab and select Info.
- Click Protect Document > Add a Digital Signature.
- Pick signing certificate and Sign.
This embeds an invisible digital signature without adding a visible line.
Verify Digital Signatures
Recipients can verify digital signatures on signed Word documents:
- Click the File tab and select Info.
- Expand Signatures to view details of all signatures.
- Click signature name to open signature details and verify document integrity. Verify Signatures
This completes the tutorial on digitally signing Microsoft Word documents. With this guide, you can start securing your Word documents using legally-binding digital signatures.


