Tab stops allow you to easily align text and create organized lists and tables in Word documents. Instead of inserting multiple spaces to align text, using tab stops ensures your text remains properly formatted as you type. In this article, we will walk through everything you need to know to effectively set up and utilize tab stops in Word.
Display Rulers in Word
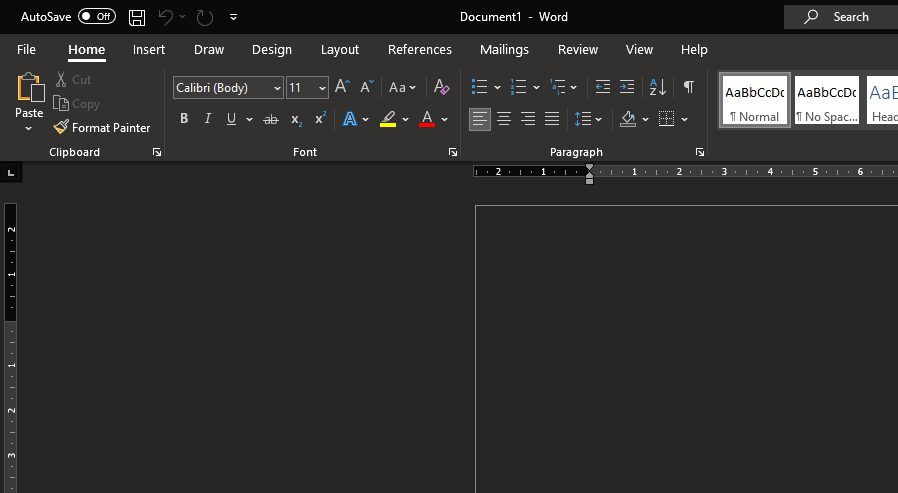
Before adjusting any tab stops, the first step is to display formatting marks and the ruler in your Word document:
- Go to the “Home” tab
- Check the boxes for “Paragraph Marks” and “Tab Marks” under “Paragraph” to show formatting marks
- Check the box for “Ruler” under “Show/Hide” to display the ruler
Showing formatting marks enables you to clearly see tabs, spaces, and paragraph breaks. The ruler displays the position of tab stops and allows you to add, move, or delete them.
Types of Tab Stops
There are a few different types of tab stops you can insert:
- Left Tab – Aligns text to the left of the tab stop
- Center Tab – Centers text around the tab stop
- Right Tab – Aligns text to the right of the tab stop
- Decimal Tab – Aligns numbers around a decimal point
- Bar Tab – Inserts a vertical bar at the tab stop
Set a Tab Stop Using the Ruler
The easiest way to set a tab stop is by using the ruler:
- Select the paragraphs you want to apply tab stops to
- Click the tab stop selector on the ruler until your desired tab type is displayed
- Click on the ruler where you want the custom tab stop
- Press the “Tab” key on your keyboard where you want to insert a tab character
The tab stop will be set at that position for the selected paragraphs. Continue pressing “Tab” to jump to the next tab stop while typing.
You can add multiple custom tab stops this way based on your formatting needs.
Set a Tab Stop Using the Dialog Box
For precise tab stop positions, you can also use the “Tabs” dialog box:
- Go to the “Home” tab and click the “Paragraph Settings” dialog box launcher
- Click the “Tabs…” button at the bottom-left
- Under “Tab stop position”, enter your desired position
- Select the tab stop type under “Alignment”
- Click “Set” to add the custom tab stop
- Click “OK” to apply
This method allows you to enter exact tab positions down to the hundredth of an inch.
Set Tab Stops for Entire Documents
One important tip when setting tab stops is that they will only apply to the selected paragraphs by default. To ensure consistency, best practice is to set tabs using paragraph styles rather than direct formatting.
To do this:
- Go to the “Home” tab and open the “Styles” pane
- Right click the style you want to edit, and select “Modify”
- Click the “Format” button, then select “Paragraph…”
- Click the “Tabs…” button and set the tab stops for that style
- Click “OK” to save the changes
- Apply that paragraph style wherever you need those custom tabs
This will set your defined tab stops for all paragraphs using that particular style.
Conclusion
Using tab stops in Word allows you to properly align text and create organized documents with ease. By showing formatting marks, displaying the ruler, and leveraging styles, you can set up tab stops exactly how you need them.
I hope this step-by-step guide gives you a good foundation for setting up and utilizing tab stops effectively in Word. Let me know if you have any other questions!


