Microsoft Word is a word processing program that allows users to automate tasks like formatting, spell-checking, and other actions.
Macros are not new to the world of Microsoft Word. They have been present for decades as a way for users to automate tasks by combining a series of actions together and assigning it to a shortcut key.
Macro is a way of shortcutting several different processes that you might do frequently throughout your document.
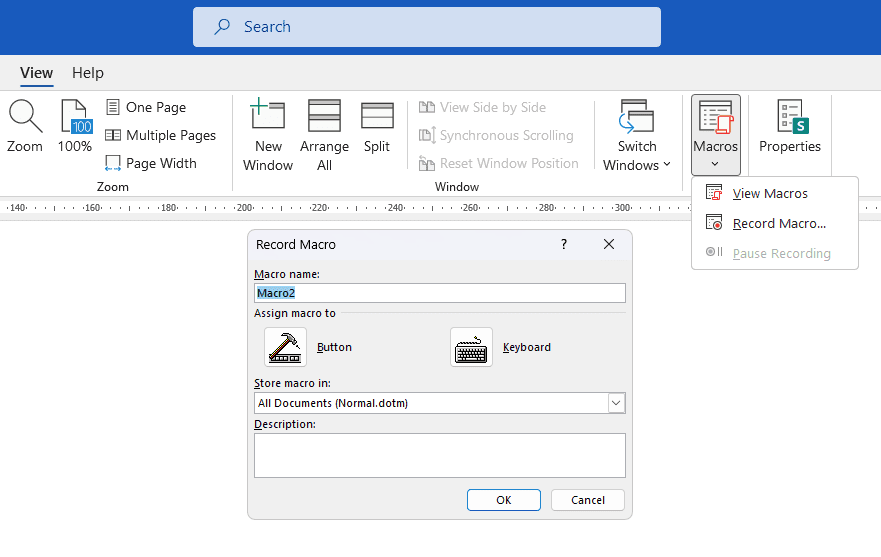
1. To do it you have to record your action. Go to the View tab, Macros > Record Macro.

2. Click the Keyboard option.

3. Then assign your shortcut key for this macro by pressing your keyboard. This can be a shortcut key that’s already assigned to something in Word or you can find a new shortcut key. For example, if we’re going to use Ctrl + Shift + M, that shortcut key is already assigned to Unindent command.

4. But if we’re using Alt + Ctrl + Shift + M, that shortcut key is currently unassigned. So, we’re going to use it. It is up to you whether you want to use the assigned, unassigned or any other combinations.

5. Click Assign and Close.

6. Now you can see that the cursor has got a cassette icon next to it. That means it’s going to record any of the actions that you currently do from here on until you stop recording.

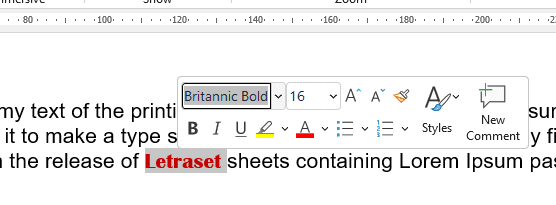
7. For this macro example, we’re going to highlight a word, change the font, size, and make it italic..
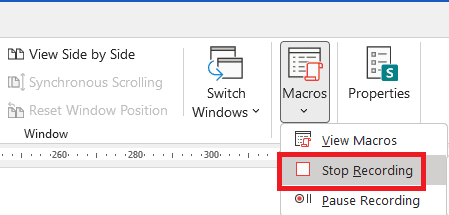
8. Once you’re finished, go back to Macro > Stop Recording. Once you’ve stopped recording, your cursor will go back to the default.
9. To test your macro, highlight another word in your document and press your shortcut key. Ours was Alt + Ctrl + Shift + M. You can see that macro works brilliantly.

10, If you decide that macro is not for you or the shortcut key is incorrect, go back to Macros > View Macros.
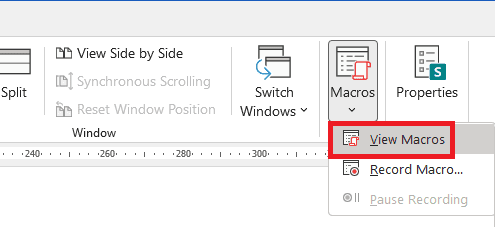
11. You can see your macro appears here and click Delete.
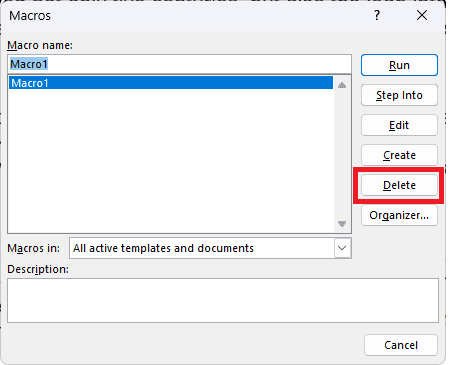
Once you’ve done that, you’re free to use that shortcut key all over again to develop another set of actions.

