Wrapping text in Google Docs allows you to position images and other objects so that text flows cleanly around them. This creates a more polished, professional look for your documents.
When to Use Text Wrapping
There are a few instances where you’ll want to utilize text wrapping:
- Adding images: Rather than having text awkwardly interrupted by inline images, you can wrap text to flow neatly around your photos and graphics.
- Inserting text boxes: Text boxes let you highlight key points, but can disrupt the flow of a document. Text wrapping lets the body content fit naturally around the inserted text boxes.
- Creating sidebars: Pull quotes, feature boxes, and other sidebar content can be visually separated from main text using text wrapping.
- Building documents with visual hierarchy: Reports, instructional documents, blog posts, and more tend to integrate visuals with text. Text wrapping improves readability and makes these documents less visually busy.
How to Wrap Text in Google Docs
Wrapping text in Google Docs is straightforward once you know where to look in the menus. Here are the step-by-step instructions:
- Insert an image, text box, shape, or other object. You can insert from your computer, Google Drive, or the web.
- Click on the object to select it. A blue border will appear around the edges.
- Choose “Format” from the top menu.
- Select “Text wrapping” from the drop-down menu.
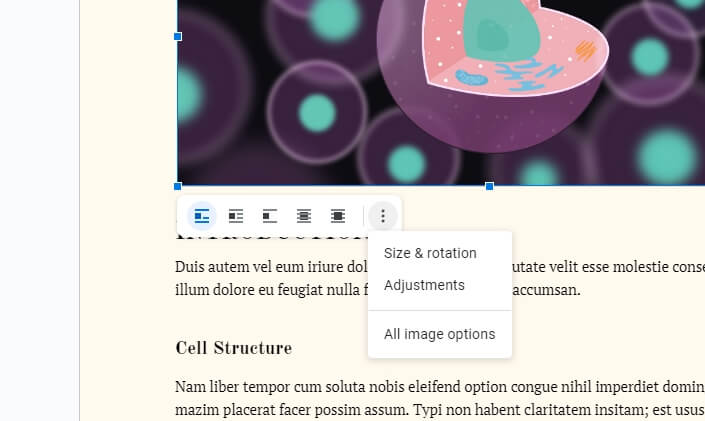
- Choose your preferred text wrapping style:
- Inline – Object sits in line with text (default setting)
- Wrap text – Text flows around object
- Break text – Text starts below object
- In front of text – Object overlays but doesn’t affect text
- Behind text – Object sits behind text
- Customize as needed. Play around with object positioning, alignment, and spacing until you’re satisfied.
And that’s it! The text will now wrap nicely around your inserted object.
Tips for Perfect Text Wrapping
Follow these tips for clean, professional text wrapping:
- Wrap images and boxes individually. Rather than grouping several visuals together, apply text wrapping one at a time for optimal results.
- Break up lengthy body text. Insert images or pull quotes to add visual interest to long blocks of text.
- Use align and indent tools. The align and indent options help straighten out uneven text wrapping.
- Add borders for defined edges. Borders around images and boxes further separate them visually from body text.
- Wrap text tightly. Choose tight text wrapping rather than leaving excessive space around objects.
Text Wrapping Use Cases
Text wrapping lends itself particularly well to certain documents and visual styles:
Blog posts and articles: Inserting images and pull quotes in blog content keeps readers engaged. Text wrapping integrates them smoothly.
Magazines and newsletters: These publications rely heavily on images paired with text. Consistent text wrapping gives them a polished look.
Reports and proposals: Reports look more professional and easy to follow when key visuals have clean text wrapping.
Instructional documents: Diagrams, screenshots, and other graphics are easier to follow when text is wrapped properly around them.
Books and eBooks: Whether you’re formatting an entire book or converting documents to eBook formats, text wrapping improves readability.
Text Wrapping vs. Page Breaks
Text wrapping differs from page breaks. Page breaks force content after a certain point to continue on the next page.
Text wrapping flows text around an object and accommodates it within the same page.
Page breaks create a hard stop and move any remaining text to a new page.
When to use each one depends on the specific goal you have for the document formatting.
Troubleshooting Text Wrapping Issues
Text wrapping can sometimes be finicky in Google Docs. If you run into issues, try these tips:
- Make sure the item you want to wrap text around is selected properly.
- Double check that text wrapping is actually turned on for that item.
- Adjust the text wrapping settings, playing around with the different options.
- Use the align and indent tools to straighten out uneven wrapping.
- Resize the element to be smaller or larger as needed to influence text flow.
- Remove then re-add the element, applying text wrapping again from scratch.
With some minor adjustments, you should be able to fine-tune any problems with text wrapping.
Wrap Text with Confidence
As you can see, it just takes a few clicks to wrap text around images, pull quotes, text boxes, and other visuals in Google Docs.
Use text wrapping to take your documents to the next level with better overall formatting and visual presentation. This simple trick makes any document look cleaner and more professional!


