Timelines could be used as a basic business tool to indicate a list of actions in order to make it more specific and detailed. Thus, timelines are necessary and effective to manage the workflow of a business, to convey historical movements, events, or periods, and to imply the stages of the process of certain tasks.
It is possible to design a timeline by drawing a long horizontal or vertical line on a paper. But, can we create a timeline inside a document? The answer is “Yes”. You are able to make a timeline within a soft file such as a document, either using Microsoft or Google Docs. In the following discussion, you will see how to make a timeline on Google Docs using google drawings.
Google Docs Timeline Using the Google Drawings
You might directly create a timeline in Google Docs document using the google drawings. However, it may be time-consuming.
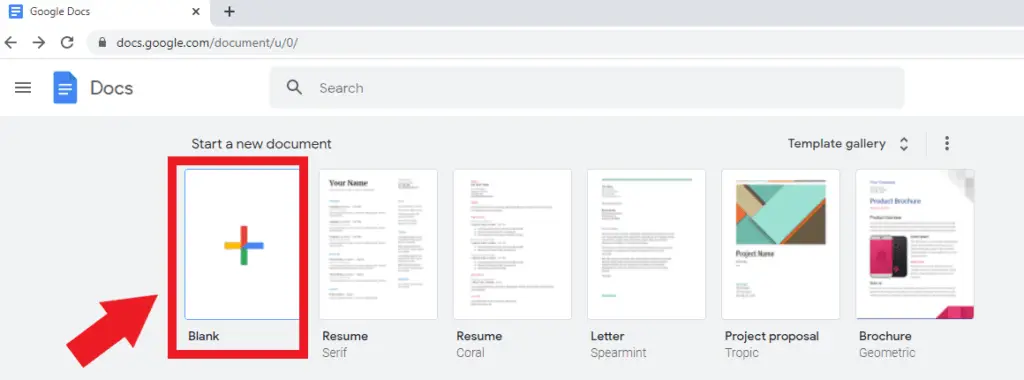
1. First, you need to open your document on your Google Docs or you can start a new document by choosing the “Blank” option on Google Docs.
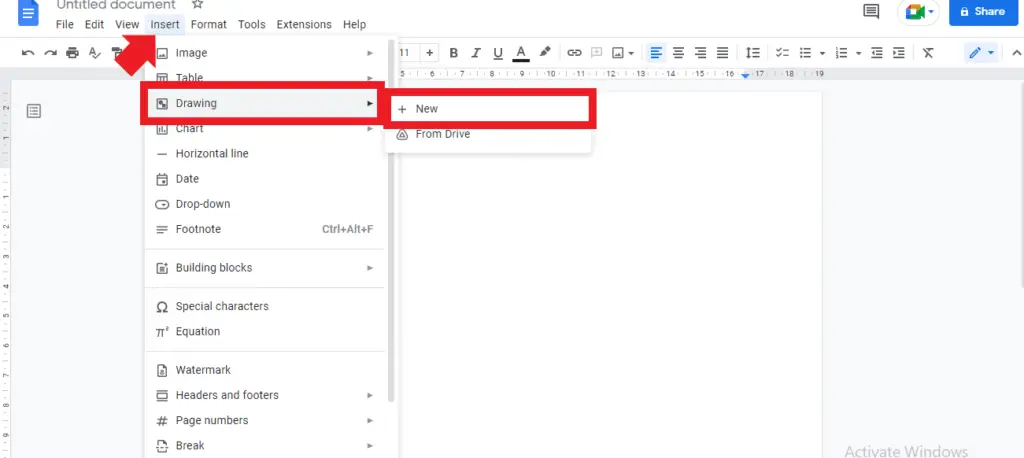
2. After that, you can select “Insert” place the cursor on the “drawing” and click “New”.
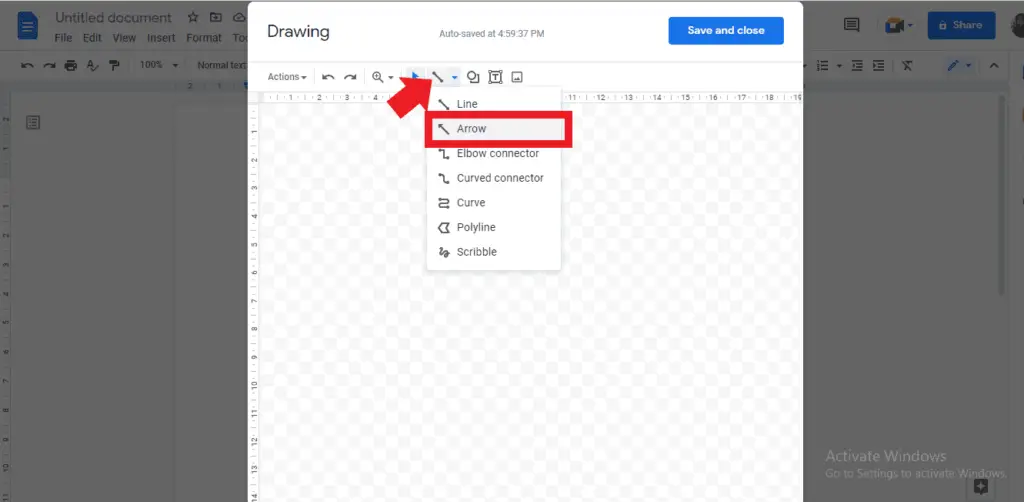
3. Then, click the “line” in the menu, so you can find and choose “arrow” there.
4. Having chosen the “arrow”, you need to click and drag the line horizontally on the drawing canvas.
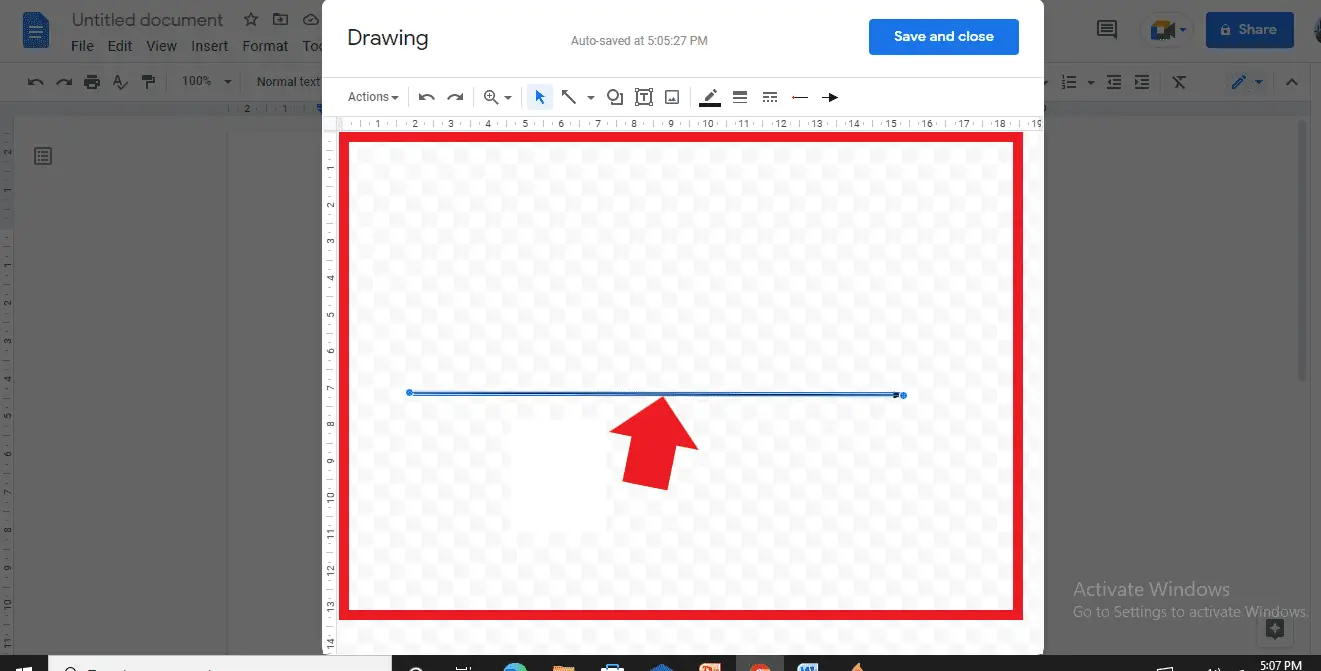
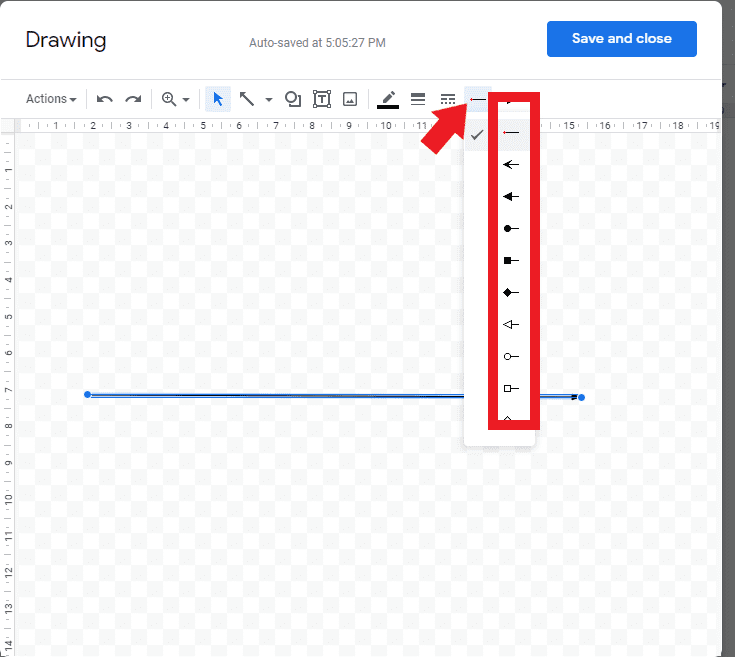
5. You can modify the start line by choosing the red arrow in the top toolbar. It will automatically add the arrow you have chosen in the start line so both ends will have arrows.
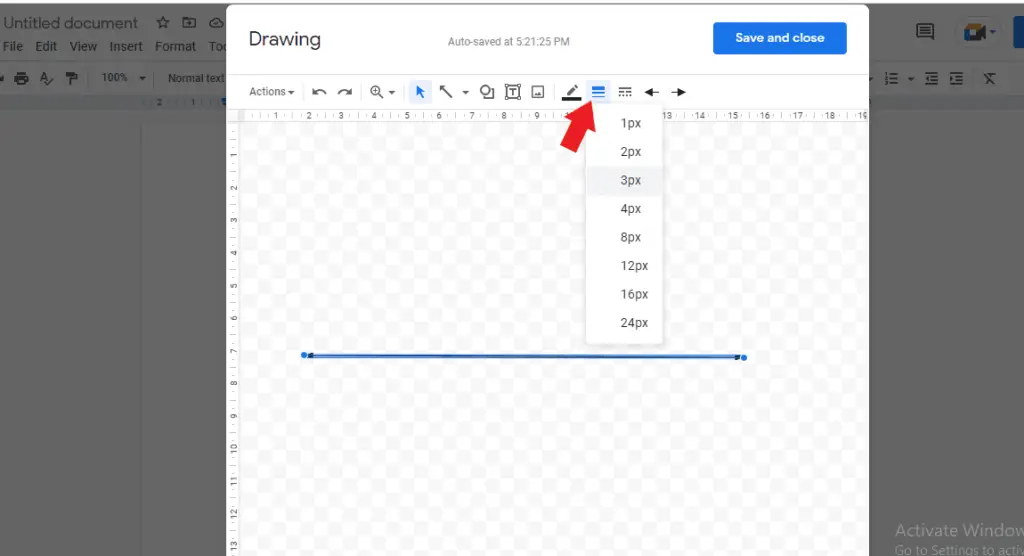
6. It’s also possible to resize the line by choosing the “line weight” tool. There are some lines that have different thicknesses.
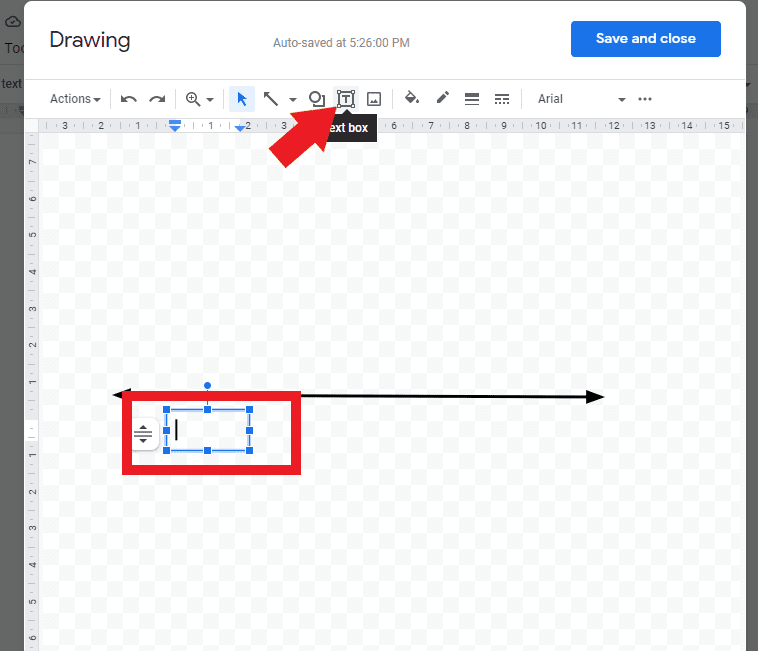
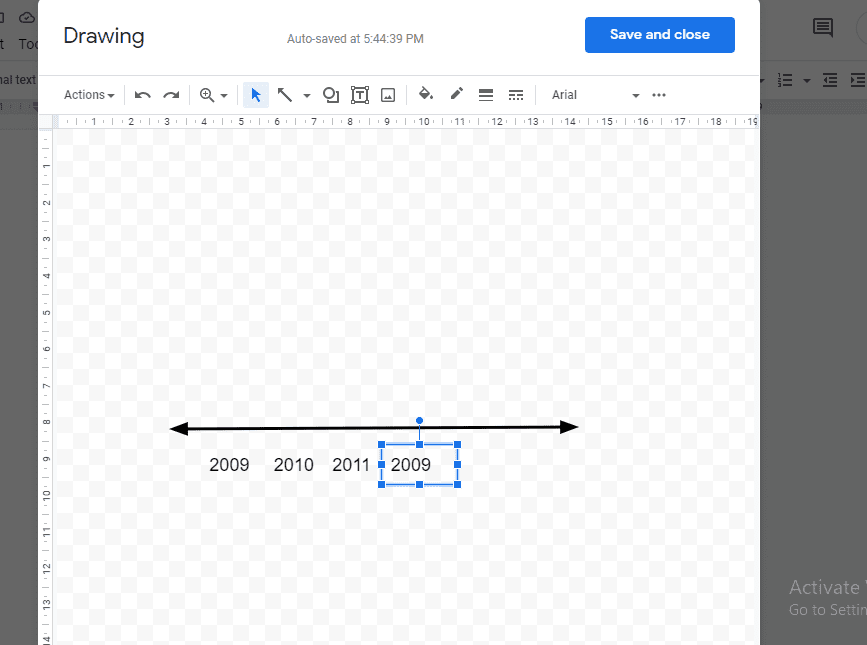
7. Next, select the “text box” tool to insert the text into the drawing to create the timeline entries. You can drag the text box to the place you prefer. To minimize the time, you may copy the first text box to create the other entries in your timelines. Use the keyboard shortcuts (these will depend on your computer). A red guideline will assist you to place the text box properly aligned.
8. You can connect the entries by inserting the vertical line in your timeline. You just need to go back to the line tool in the toolbar as you do in the previous step.
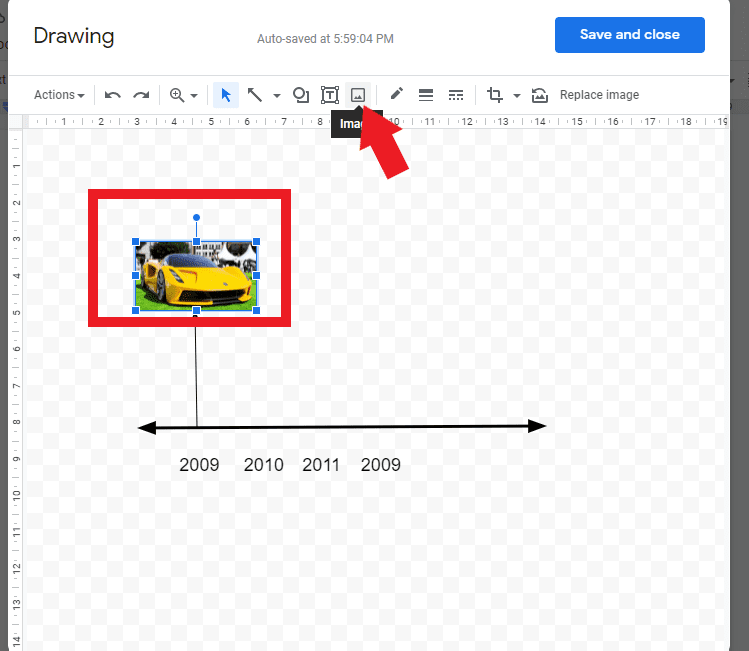
9. Creating a timeline sometimes needs a picture in it. To do this, you can also insert a picture in your timeline by selecting the “image” tool in the toolbar and then choosing upload. Once inserted, remember to resize your picture as needed.
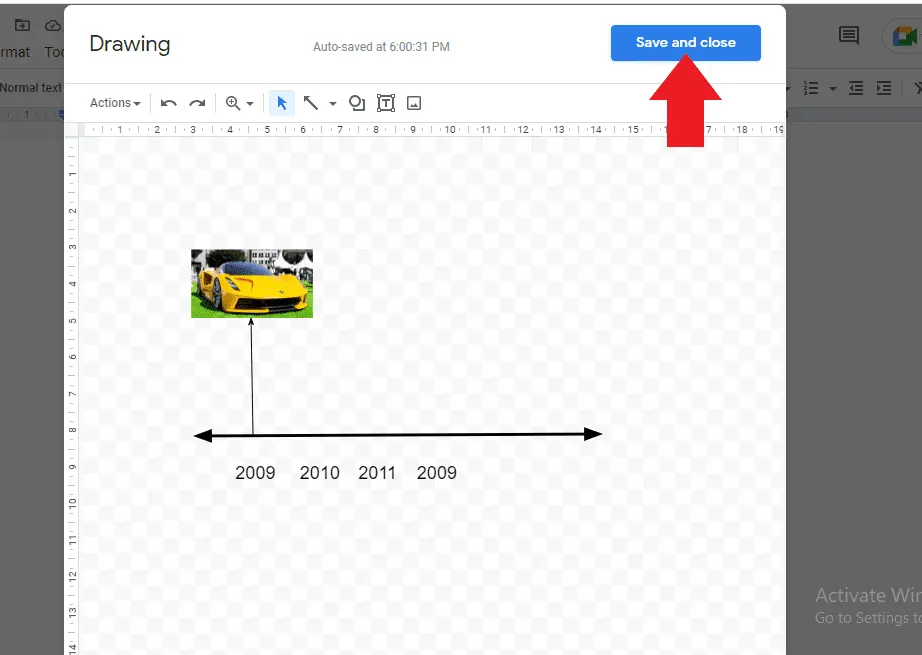
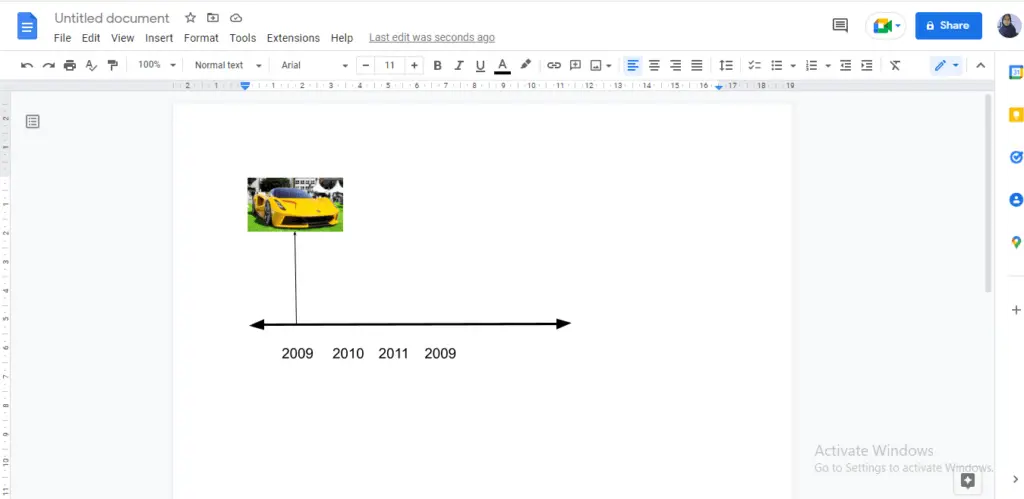
10. When all the entries have been inserted into the canvas, you can click “save & close”. It will add your file to your Google Docs document.
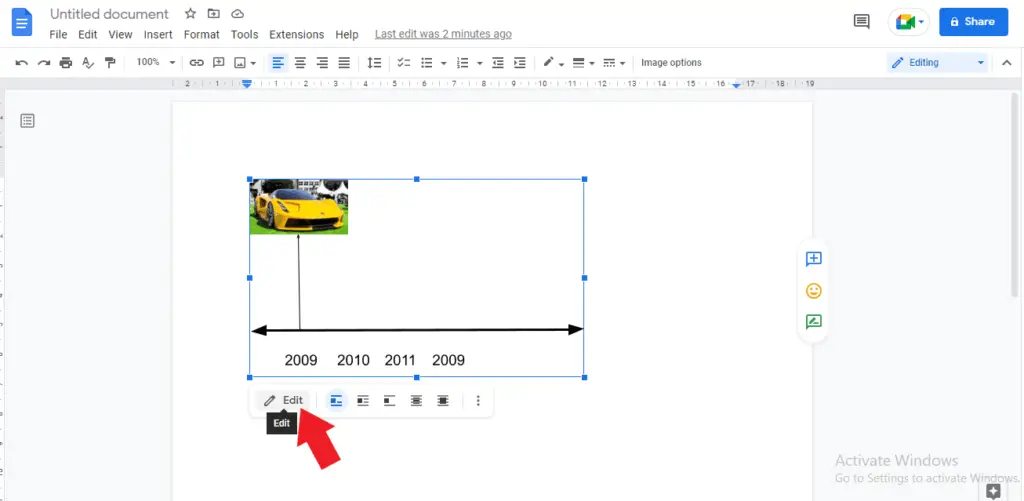
11. If you see any problems or issues in your timeline that you have added in your document, you can simply click the timeline and hit “Edit”.
That’s all on how to make a timeline on Google Docs. It’s easy, isn’t it? You just need to follow those steps and you will be doing it easily.


