There are times when only words and figures will suffice to describe your feelings.
Art may be a powerful tool for expressing yourself at times. Microsoft Word, on the other hand, acknowledges this need and provides users with the opportunity to draw on a page.
Draw something fresh if you’re looking for a different way to present your ideas. It’s simple, it adds a little flair to your paper, and it may prove to be a more successful method of communicating your thoughts.
Follow along with us as we take you through the drawing process step-by-step. This is especially helpful for visual learners.
Creating Freehand Drawings in Word
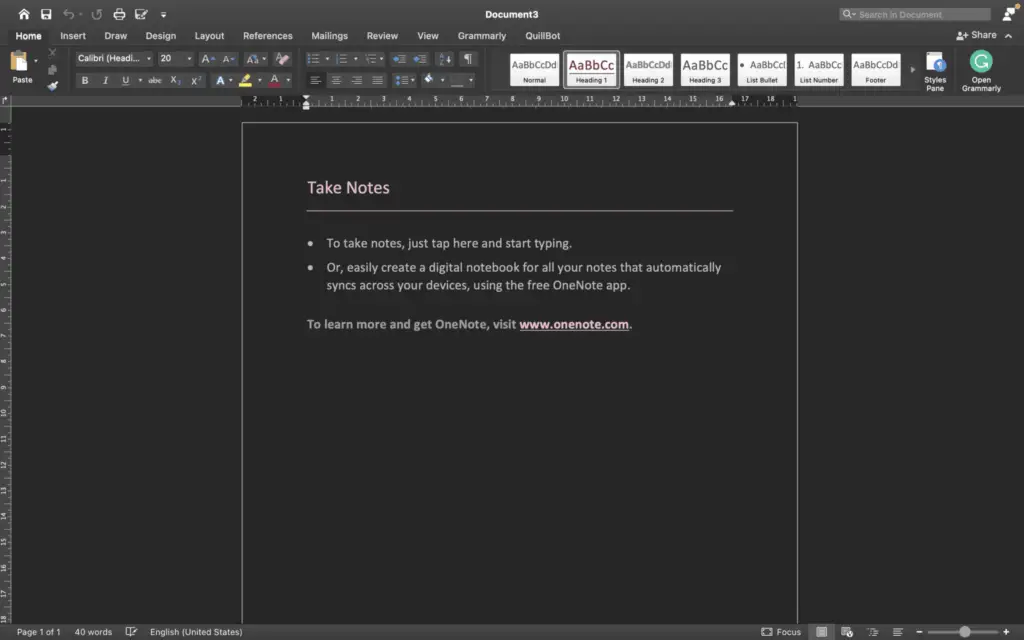
If you want to make more unique Word drawings, you can use different pen drawing tools to draw on a Word document. You can do this with a mouse or trackpad, but you can also use a touchscreen device or graphics tablet to do it.
1. Open your Word document.
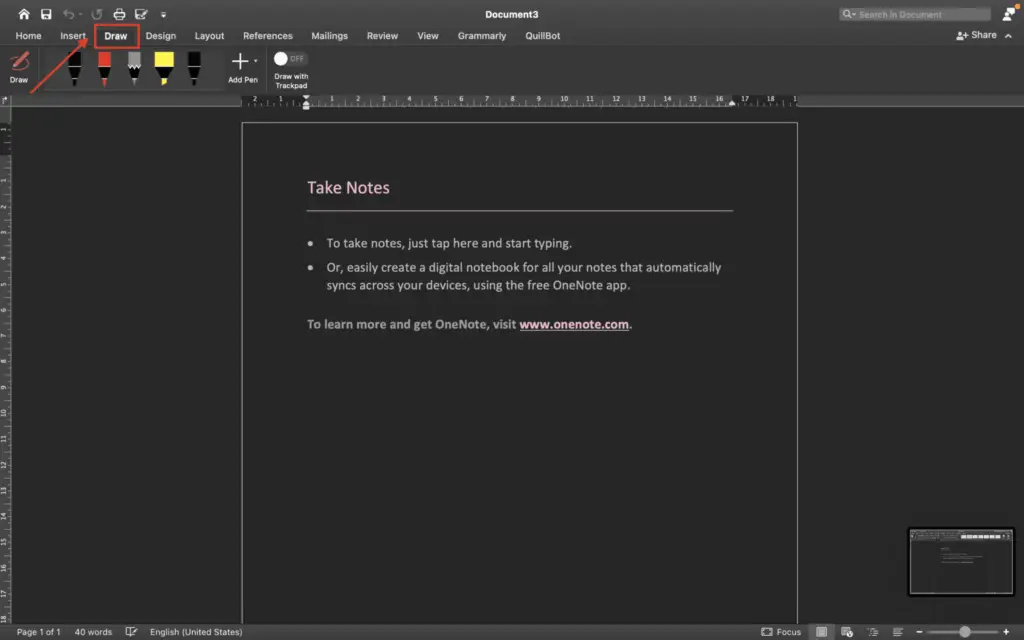
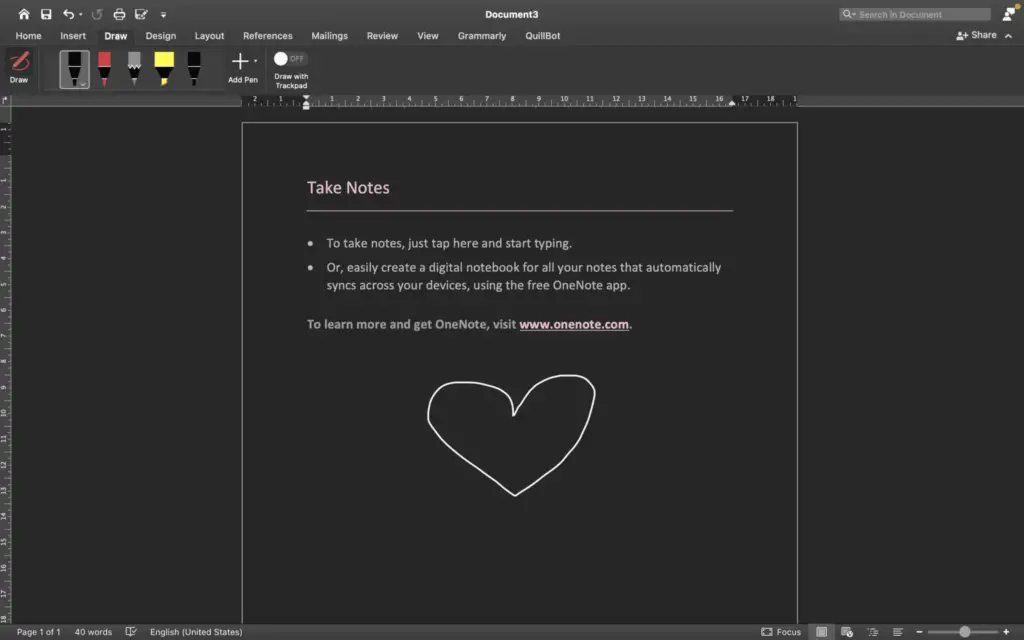
2. To start, click on the ‘Draw’ tab on the ribbon bar. In this case, it will show you what pen drawing tools you have.
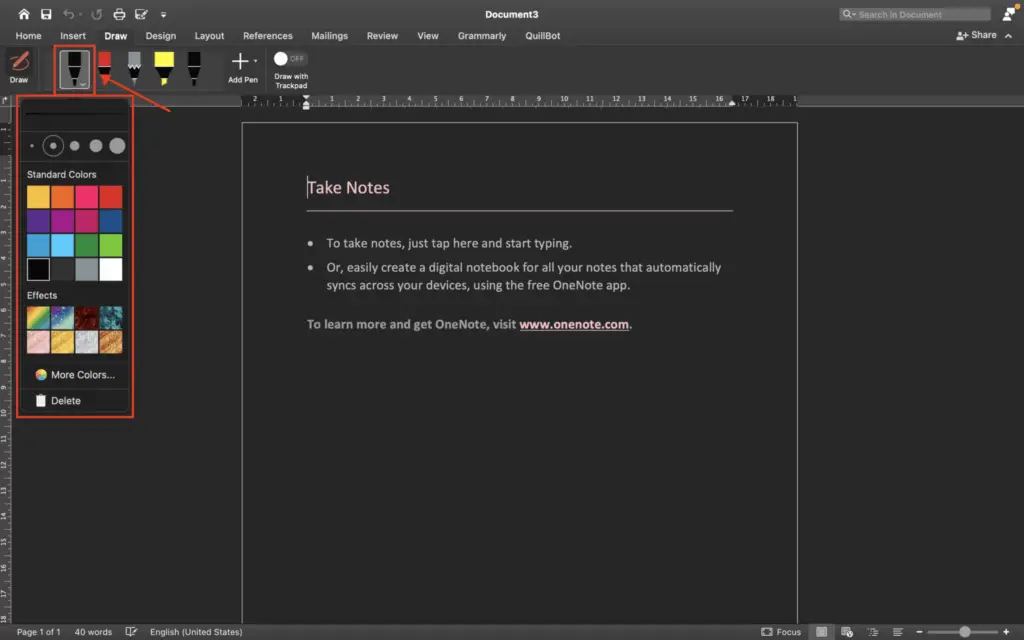
3. In the MacOS, usually you will find five choices of pens. You can choose based on your needs. Then, for a variety of colors, effects, and sizes, click the small downward-facing arrow.
4. It’s then time to point your mouse where you want to draw. Then, draw right away. Here is an example of the final look of the drawing. You can draw anything you like or your needs in your Word documents.
So, what do you think about those four steps? It’s easy, right? Just follow those four easy steps on how to draw in a Word document by using amazing pen drawing tools.
By the way, if you are looking to draw something a little more tidy, the competitor platform — Google Docs offers some advanced drawing tools that would make the result more presentable.
