We all know that Microsoft Word offers wide flexibility of making a watermark to the document. But doing so on Google Docs seems pretty tricky. It goes down to the fact that the service is fairly minimalistic and simple — a typical approach for web-based services. However, we actually can add a watermark in a Google Docs document.
It’s possible to rely on the good old Drawing menu and then insert the created watermark from it to the document. But there is also a new way that is arguably quicker for a multiple-page document.
In this guide, I will explain both methods. Let’s start with the classic one.
How to add a watermark in Google Docs (old way)
1. First, launch the document you want to a watermark on.

2. Go to Insert > Drawing > New.

3. Click the Text box to insert it.

4. Create a text box with a cursor which you can type on it later.

5. Now, type the watermark text. It is best to make it bigger.

6. You may skew it a little to give a more watermark look. But this is optional.

7. Watermark should not be the main focus, therefore, using a dimmer color is recommended. When you finished, click Save and Close.

8. The watermark has been inserted and may spoil the pleasant order of the document. But don’t worry, we will sort it out later.

9. For now, click on the watermark and select In front of text.

10. Adjust the size and its position over the page.

11. When you have done, you can put it Behind text.

12. Finally, a watermark has been added.

Now, you might have noticed it only appear on one page. Inserting manually across multiple pages sounds tedious, but thankfully Google Docs has added watermark capabilities on its platform.
This new watermark feature allows us to insert an organization logo or just a regular watermark on all pages of the document. For more information, check out the guide below.
How to add a watermark in Google Docs (new way)
1. Prepare the watermark image file. If you already created a watermark from the previous guide, you may download it as PNG to be used later.

2. Then, under the menu Insert, click Watermark.

3. A new panel will appear, click Select Image.

4. Navigate to Upload, then browse/drag the watermark file.

5. Select the file from your computer.

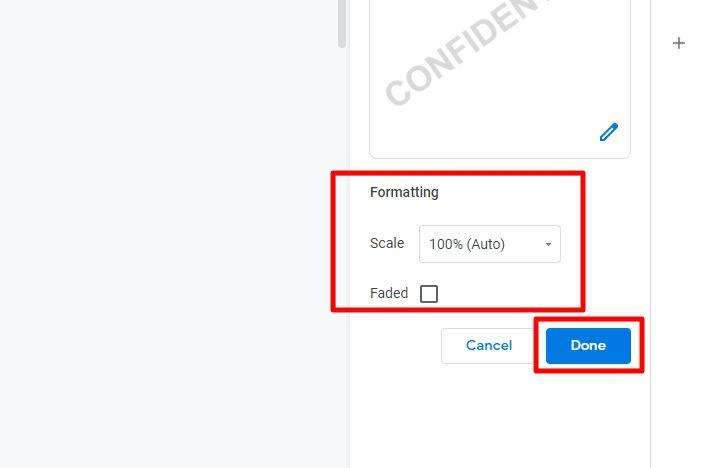
6. Adjust its Scale and Faded feature, then hit Done.
7. The watermark has been inserted into all pages.

The second method is fairly simple and perhaps, more appealing in most cases. However, the editing flexibility offered by the first method cannot be discounted. In the end, try to experiment with both tools and which one is best for your instance.


