Including your signature in a Microsoft Word document is the most effective way to distinguish it from your own, especially for documents such as letters or contracts. Learn how to sign a Microsoft Word document using the instructions below.
There are a variety of options for adding your signature to a Microsoft Word document. You have the option of inserting a photo of your own handwritten signature in Microsoft Word.
How to insert a photo of your own handwritten signature
1. Open your Word document.


2. Then, the second step is to click ‘Insert’ in the menu bar.


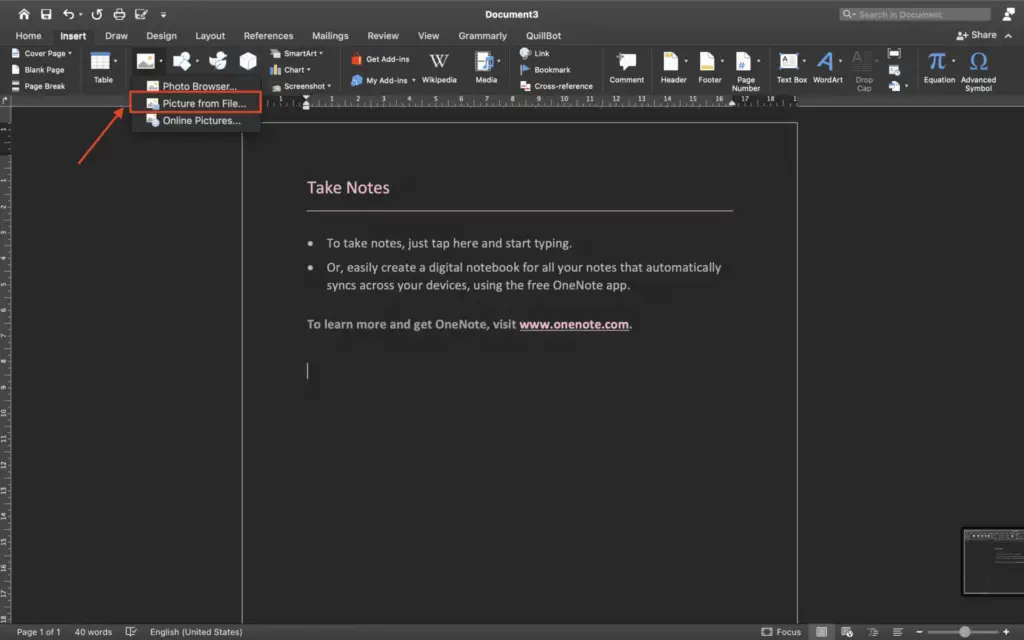
3. The third step is to click ‘Pictures’, then click the down arrow and select ‘Picture from file’.

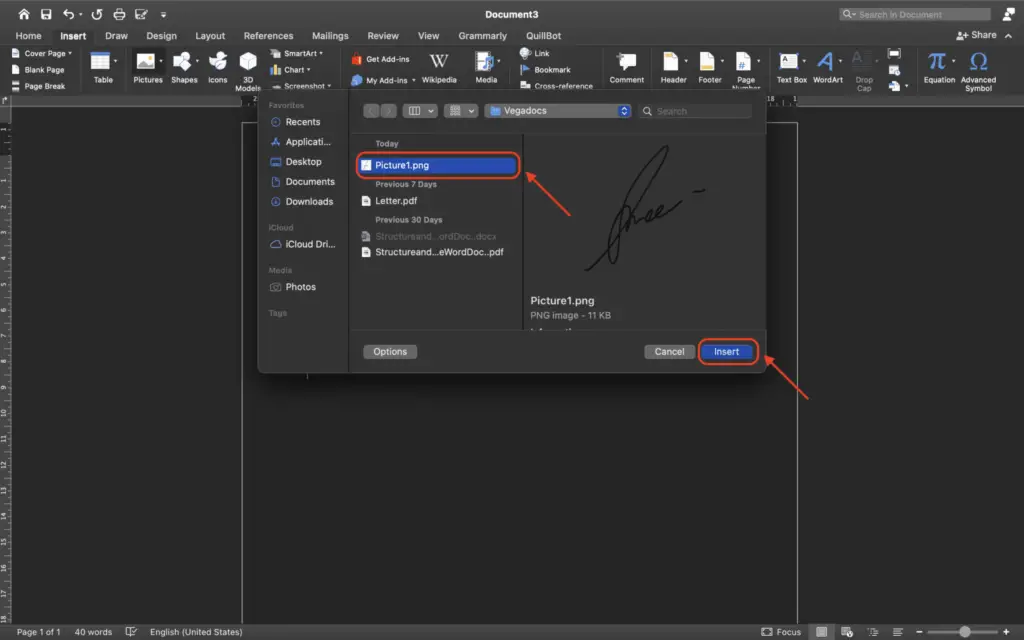
4. Then, look for your signature file which is in the form of a photo in png format with a transparent background. Why? So that your document looks neater. Then, click ‘Insert’. Before that, make sure that you have prepared or saved your signature in the form of a picture.

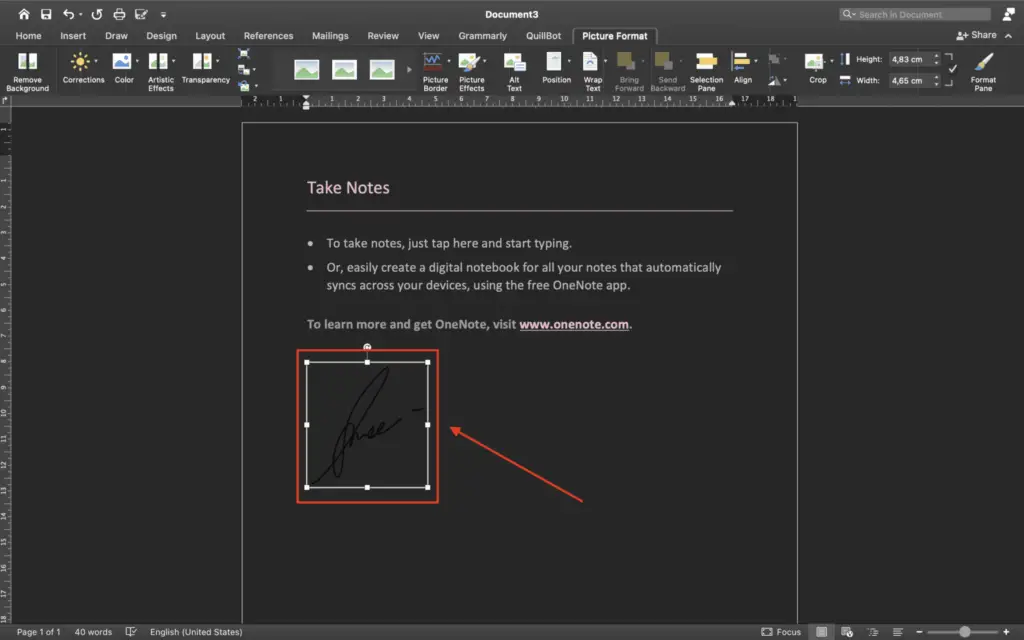
5. After that, adjust the location of the signature that you have inserted.

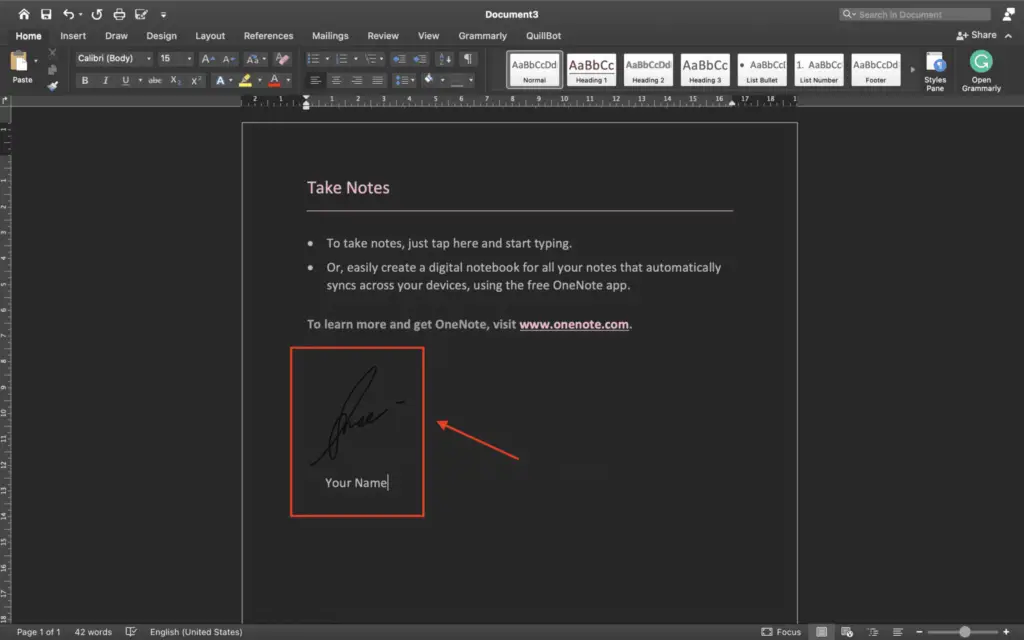
6. Here is the final look of your signature inserted in the word document. Then, the final step is to write your name below your signature.

What do you think about those six steps on how to insert your signature in the Word document? It’s easy, isn’t it? Just follows those six steps and you can easily insert your signature into your documents.


