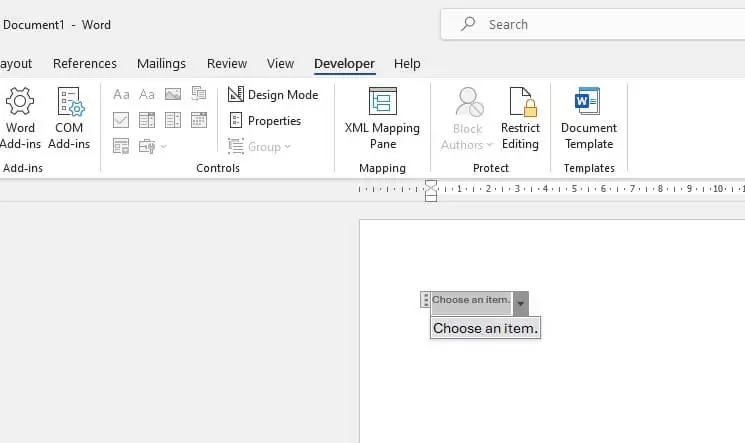
Drop-down lists in Microsoft Word allow you to create forms and templates where users can select items from a predefined list. This enhances efficiency as users don’t have to manually type information or select from an overwhelming number of options.
Adding a drop-down list is easy, but you may sometimes need to edit an existing one. This article will guide you through the process.
Enabling the Developer Tab
The first step is to enable the Developer tab in the Word ribbon, if it’s not already visible. The Developer tab contains the controls for working with drop-down lists.
Here’s how to enable it:
- Click the File tab and select Options.
- Click Customize Ribbon on the left.
- Under Main Tabs, check the box next to Developer.
- Click OK.
You should now see the Developer tab in the ribbon.
Selecting the Drop-Down List
To edit a drop-down list, you first need to select it:
- Click anywhere in the document to deselect any objects.
- Click the drop-down control to select it. You’ll see a dotted border around it.
Accessing Properties
With the drop-down list selected:
- Go to the Developer tab.
- Click Properties in the Controls group.
Alternatively, you can right-click the control and select Properties.
Editing Drop-Down List Properties
In the Content Control Properties dialog box, you can edit various settings:
- Title: Edit the title that appears next to the control
- Tag: Add keywords for searchability
- Show as: Change how the control appears
- Color: Change the color of the control
Editing List Items
To edit the actual items in the list:
- Go to the Drop-Down List Properties section.
- Click an item and edit it in the Display Name box.
- Click Add to add more items.
- Click Remove to delete items.
- Use the arrow buttons to reorder items.
Once done, click OK to apply changes.
Additional Editing Options
You can make further edits with the control selected:
- Resize and reposition it by dragging
- Delete it by pressing Delete
- Format it using the commands on the ribbon
Linking a Drop-Down List to a Table
For more dynamic forms, you can link a drop-down list to data in a Word table:
- Select the list control.
- In Properties, go to Get values from > Table in document.
- Select the table you want to link to.
The rows from the first column will automatically populate the list.
Whenever the table data changes, the list updates instantly!
Troubleshooting Issues
If a drop-down list isn’t working properly, try these fixes:
- Protect the form to enable editing. Go to Developer > Restrict Editing > disable protection
- Check if the form is corrupted. Create a new one and import any linked data
- For online forms, check compatibility mode and enable editing
- Refresh linked fields and tables by selecting them and pressing F9
- Consider switching to a combo box if a large list lags in performance
Tips for Effective Drop-Down Lists
Here are some tips:
- Use clear, descriptive titles so users understand what they are selecting
- Organize logically – alphabetical, numerical, chronological, etc. This helps users find items faster
- Limit list length for easier scanning. Ideally under 12 items
- Test forms thoroughly before sharing to catch any errors
Conclusion
Learning to properly edit drop-down lists unlocks greater customization options for your Word forms. Follow the steps in this article to update list items, formatting, interactivity settings, and more to create efficient forms tailored to your needs.
The key is enabling the Developer tab, selecting the control, accessing Properties, and applying your changes thoughtfully. Linking the list to data takes it a step further.
And if issues arise, there are troubleshooting tips to get back on track. Use these techniques to boost productivity and streamline data entry for yourself or users of your Word templates and documents.


