Margins are used to prevent the text from extending too far so it will avoid the text from colliding with the document’s edges. Adjusting the margin in a document is necessary to improve the document’s aesthetics and make the document easier to read.
The default margin in a Google Docs document is one inch on each side of the page. However, you can customize it to your preference. In Google Docs, setting margins can be applied by using a ruler or using the page setup dialog box. How to set margins in Google Docs will be elaborated into the following discussion:
Setting Margin in Google Docs Using Ruler
Changing the margin with the ruler in Google Docs can be done by following the steps below:
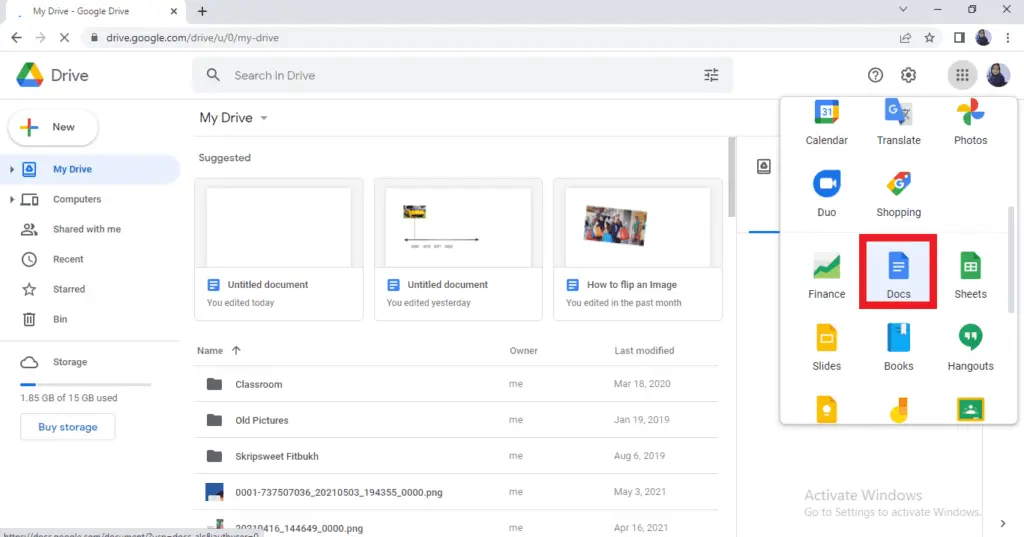
1. First, you need to make sure that you are logged in to your Google Drive account. So, you can access your document in Google Docs.

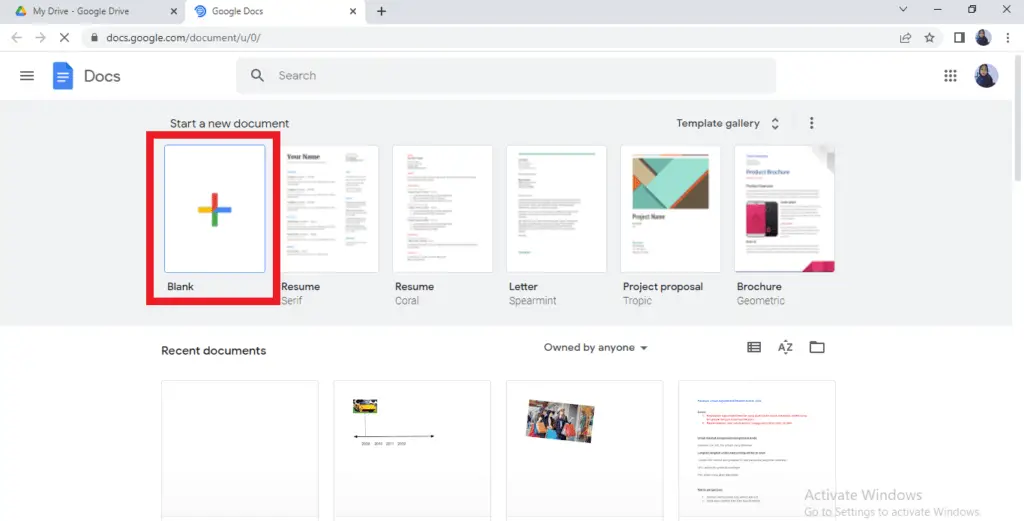
2. Choose “blank” if you require a new document.

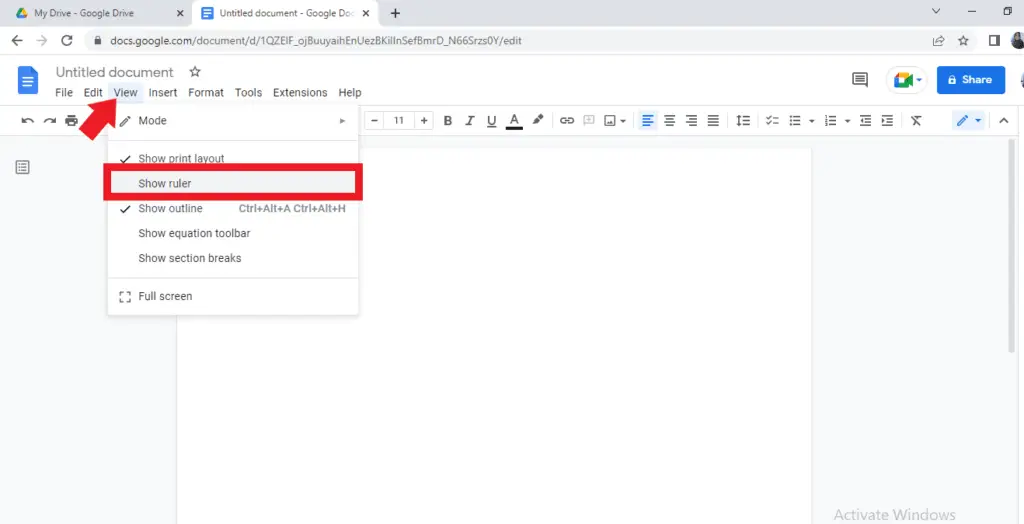
3. When the document in Google Docs is opened, you can start setting the margin by using the ruler in your Google Docs. To view the ruler, you can click “View” in the toolbar and select “show ruler”.

4. You can start changing the left margin first. You need to move the cursor into the grey section of the ruler to the left of the blue triangle and rectangle. Wait till the cursor turns into a double-headed arrow and then click and hold on the gray bar.
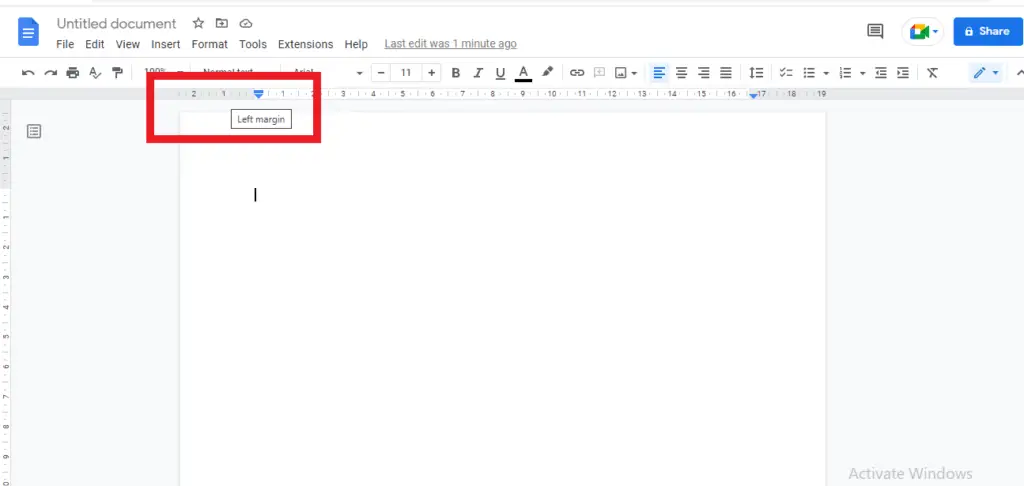

5. When you move the cursor, you will see the position of the left margin move as well. you might see the vertical blue line on the page as the guidance for the new position of the left margin that you are applying. Once you find the position you prefer, you can release the mouse button and the Google Docs automatically will adjust the left margin.
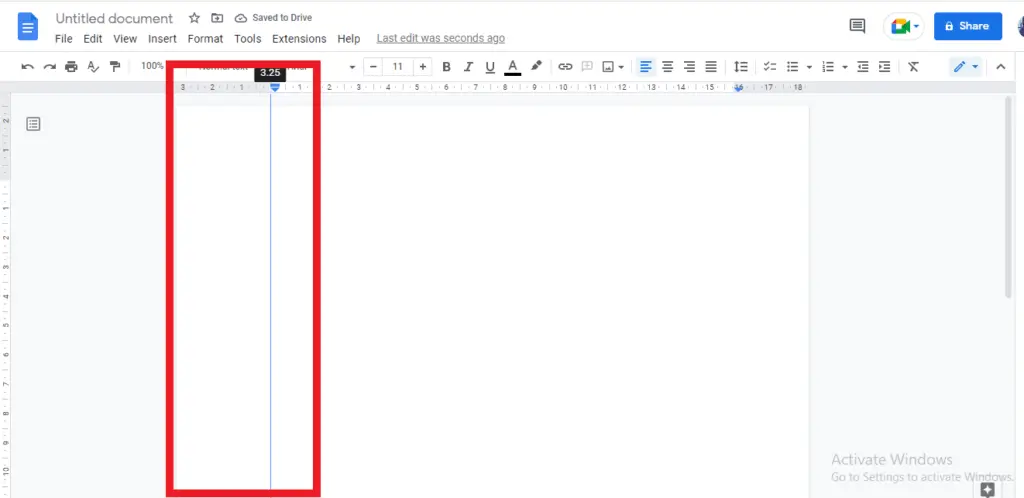

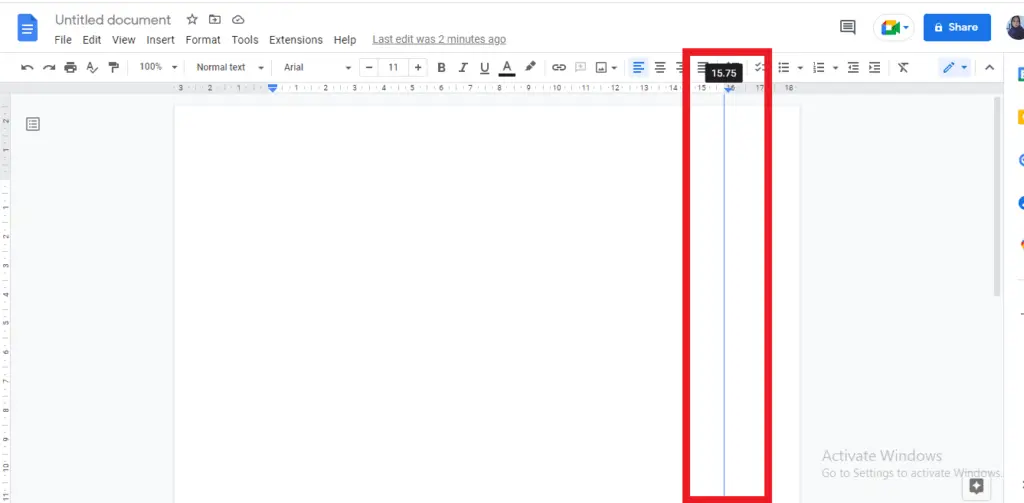
6. Having done adjusting the left margin, you can directly change the right margin through the same techniques as you have applied to the left margin. Move the cursor into the gray bar to the right of the ruler.

Setting Margin in Google Docs Using the Page Setup
Instead of using the manual technique to set the margin, you might also use another option of setting the margin measurements at a precise number through the page setup option. It would be easier and less time-consuming.
1. You can start by selecting the ‘’file menu” in the toolbar.
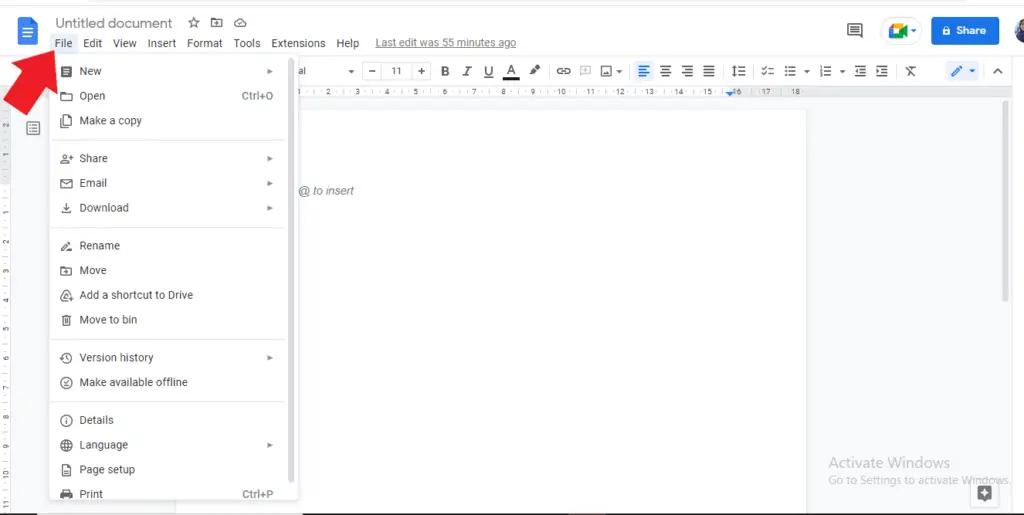

2. Scroll it down until you find “Page setup” and simply click on it.
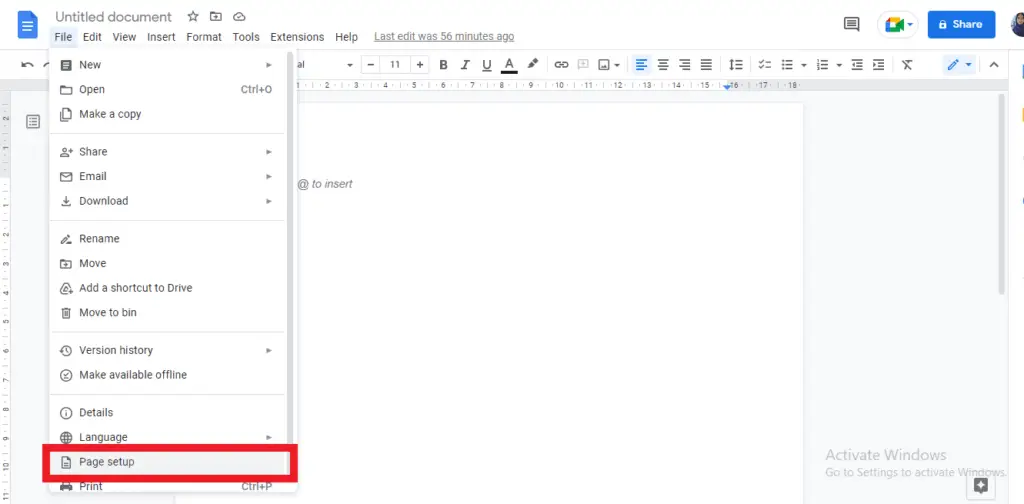

3. The dialog box will appear and you can insert the margin measurements you want to use. Every number you are inserting will be in inches. You might set the margin for the left, right, top and bottom quickly.
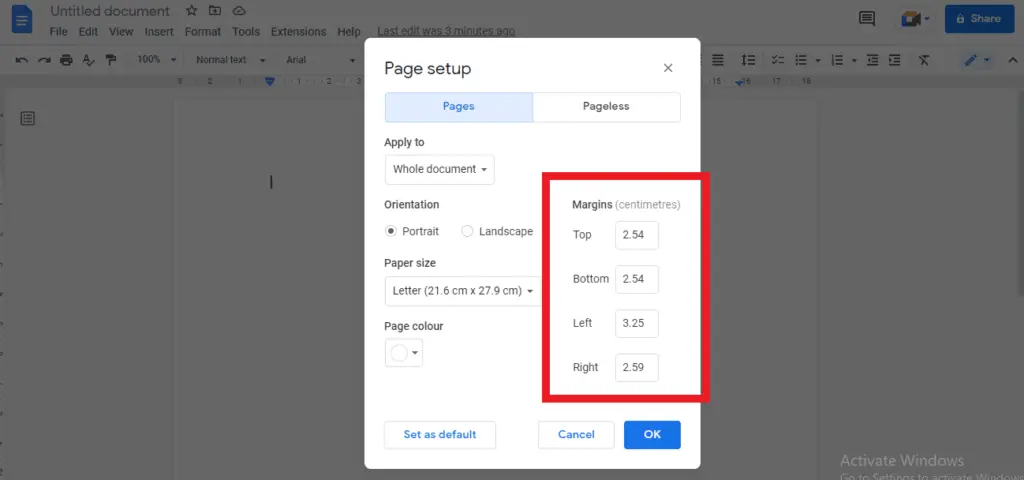

Once you have entered all the numbers into each box, you can click “OK” and it will automatically update the margin setting for your document.


